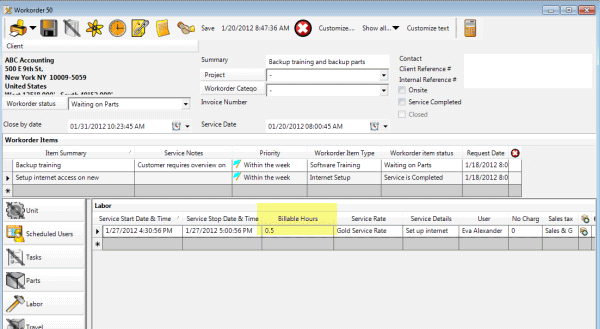
In this tutorial we will go through the steps to customize an existing locale "on the fly" so that the labels you are seeing of that entry screen display as works best for your company.
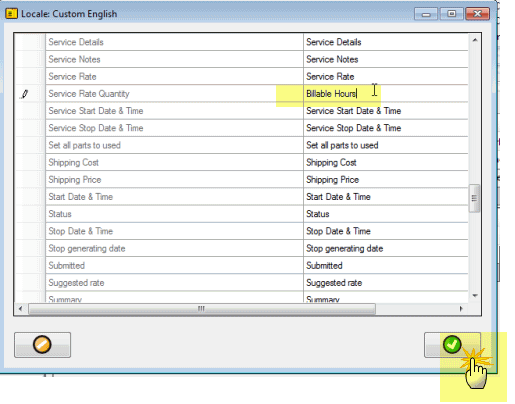
For example, you may want what is default labeled as Service Rate Quantity in the Labor subsection of a workorder to instead be labeled as Billable Hours
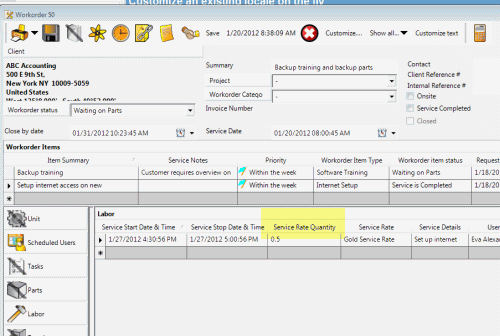

There are 5 steps:
1. Log in as the AyaNova Administrator
2. Select the Customize text... menu option at the top of the entry screen
3. Find the existing text listed
5. Exit out of the entry screen
6. Open up the entry screen to see the change
1. Log in as the AyaNova Administrator
Only when logged in as the AyaNova Administrator will the menu option to Customize text... will show
2. Select the Customize text... menu option at the top of the entry screen
Select the menu option for the entry screen's text labels you want to edit.
In this tutorial we want to edit what is default labeled Service Rate Quantity, so we will open a service workorder entry screen and select the menu option Customize text

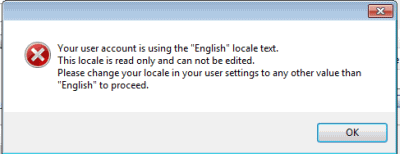
If you receive an message below, you MUST edit your user account via the User grid under Administration selecting a custom locale that has been created instead.
You will need to first follow the tutorial on creating a new locale and assigning it to your user account first. Than you can come back and perform this tutorial.
3. Find the existing text listed
The existing label text is listed in alphabetical order.
Just scroll through the listed labels and find the existing label text.
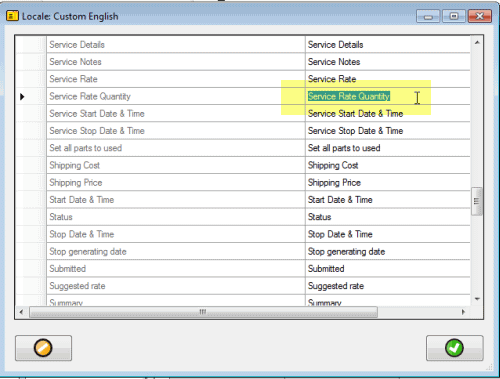
4. Edit the existing text and save
5. Exit out of the entry screen
The new text label will not show until you have exited out of the entry screen.
And if you have edited the text label for the main AyaNova navigation grids, you will need to exit out of AyaNova itself and then log back in.
6. Open up the entry screen to see the change
