It is always recommend to read through all instructions first before proceeding.
A. IIS (Internet Information Services) is installed on the computer you want to run DataPortal on
B. AyaNova is networked and is the latest version.
C. AyaNova is installed on this computer and successfully runs
D. Run the AyaNova setup file to select the data portal installation
A. Is IIS (Internet Information Services) installed on the computer you want to run DataPortal on?
Depending on the your operating system, you might install the required IIS features by going to Add/Remove Windows Components or through Turn Windows Features On or Off or through Server Manager. If not sure how to add the IIS Windows feature components required onto your operating system, do a search online including your operating system version.
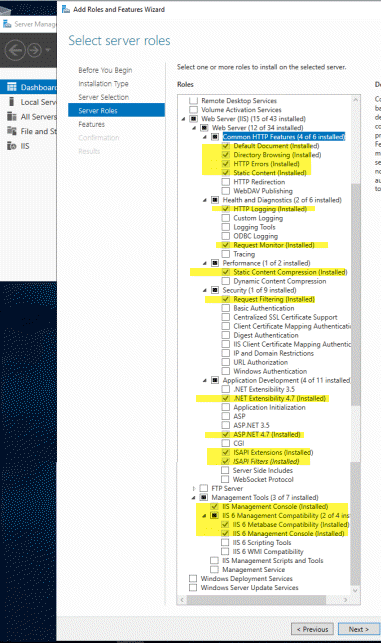
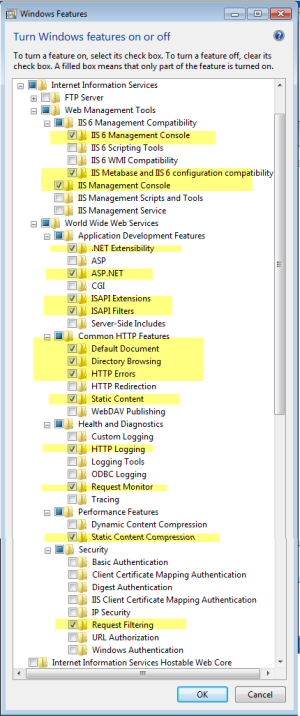
In the two screenshots below you will see that the specific components that must be installed are the same regardless of which operating system, just how you get there, the order listed etc may not be the same depending on the operating system. We have included below an example from a Windows 2019 Server and a Windows 7 computer:
Example showing the IIS features selected for a Windows 2019 Server:
Example showing the IIS features selected for a Windows 7 64bit:
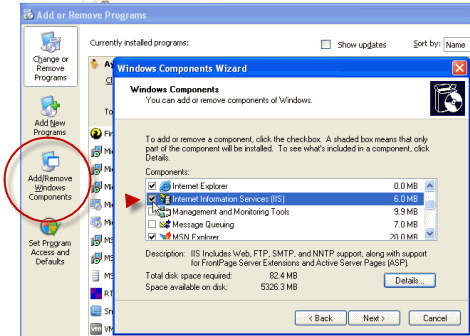
Below is example screenshot of selecting to install IIS onto an old XP 64 via Add/Remove Windows Components
•Once installed, run Windows Updates again and apply all recommended updates
•Reboot again and check Windows Updates again, before proceeding with the Data Portal installation.
B. Confirm that your AyaNova is networked and is the latest version.
•AyaNova must be networked using either Firebird Server, SQL Express or SQL Server. The DataPortal will not run if using the default stand-alone installation of AyaNova.
•Refer to the AyaNova Help documentation section on networking AyaNova if you have not yet done so.
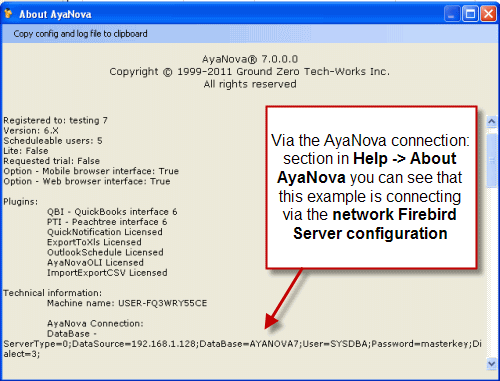
C. AyaNova is installed on to this computer and successfully runs
•Run AyaNova. Log in. Make sure you can log in successfully, and are connecting to your networked AyaNova database.
D. Run the AyaNova setup file and install the data portal
Run the AyaNovaSetup.exe installation again on this same server where you have already configured network AyaNova use and select the network administrator setup so that you can select to install the Data Portal

•As you will be selecting the Network administrator setup to install the Data Portal, run the AyaNovaSetup.exe file from the same folder where you placed the copy of your networked edited config.txt file as per step #7 of your AyaNova networking steps - as it will expect to find a copy of the config.txt file in the same folder.
•If you run the AyaNovaSetup.exe file from a folder where a copy of your config.txt file is not located, you will get the following message. Just click on Ignore.

Select to Install AyaNova Data Portal (requires IIS)

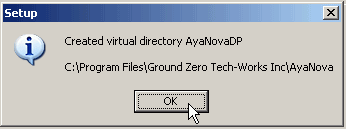
During the installation it will notify you that it created the virtual directory AyaNovaDP from C:\Program Files (x86)\Ground Zero Tech-Works Inc\AyaNova (or C:\Program Files\... if 32 bit)
If during the installation, it sees that there already is a config.txt file and will ask you if you want to overwrite it - click NO
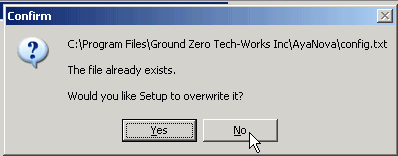
•You do NOT want to overwrite your config.txt file because it is already configured to point to your networked AyaNova database
NOTE: if you get a message such as below about replacing a file, this is occurring because you have something running. Click Abort, and then check to make sure you do NOT have the AyaNova program running, nor OLI, and check Services to make sure that the AyaNova Generator is shut off while installing. Then run the installation again.

d. Once installation is complete, continue with configuration and testing
If you encounter any errors or issues refer to DataPortal Common Issues