Read through all instructions first before proceeding.
1. Both AyaNova and AyaNovaLite requires Microsoft .NET Framework 4
•If the .NET Framework is not found the setup program will guide you through downloading and installing it.
•If for some reason due to your computer, the setup does not guide you through, then download via the link at https://www.ayanova.com/download.htm and install.
2. If you haven't already, log into the computer as you normally do
•Do not perform any installation of AyaNova nor AyaNovaLite via remote access
3. Ensure no other programs are running during setup.
4. Download the AyaNova installation file AyaNovaSetup.exe from the AyaNova web site https://www.ayanova.com/download.htm to a temporary folder on your hard drive
5. Double-click the AyaNovaSetup.exe file to run the installation and click Next

6. Review and agree to the license agreement, and click Next

7. The default option is "Default setup with sample database". This is what you want, so click Next
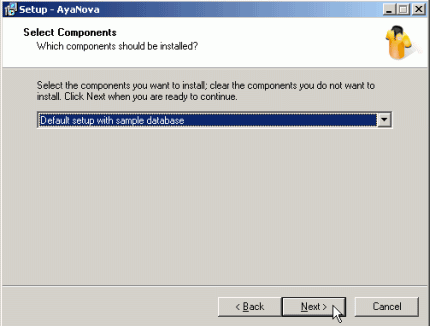

NOTE: the network setup option is ONLY if you have performed the preceding steps as per the network steps for the specific AyaNova database server setup you are following and ONLY if you will be running the full AyaNova.
8. The installation shows additional AyaNova optional products you may be interested in trying out or using when installing the default stand-alone AyaNova.
If you are not installing any of the optional items skip to step 9.
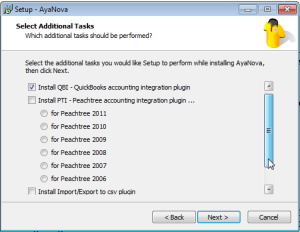
•Refer to the QBI (QuickBooks interface) Help manual for details on requirements (QBFC7.0, QuickBooks program also installed to the local hard drive, QuickBooks version compatibility etc) installation, and use.
![]()
•Refer to the PTI (Peachtree interface) Help manual for details on requirements (Peachtree program also installed to local hard drive, Peachtree version compatibility) installation and use.
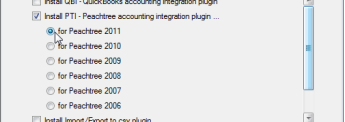
•This installs client, part and unit import/export utilities. Refer to Import Utilities - Client or Parts
![]()
•Do not check-mark the Firebird SQL to Microsoft SQL migration utility as it would only be used with a full AyaNova that you will be networking.
9. The installation displays details on what it will now install. Select Next and it will install the databases and program files.
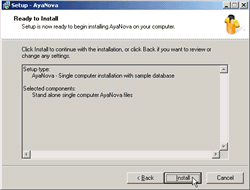
10. The installation is now complete.
11. You can now start the AyaNova program with the installed sample trial database
•Run AyaNova from the desktop icon
![]()
•Or run AyaNova from the Start -> All Programs -> AyaNova -> AyaNova menu option

12. When started, AyaNova will pre-load items it needs for faster access later.

13. The AyaNova login screen will first appear as it defaults to loading the full trial AyaNova program. Click on the OK button to load AyaNova.

14. Toggle to running the AyaNovaLite program by selecting the menu option Help -> Trial: Switch to AyaNovaLite. When you do so, AyaNova will exit and the next time you run, it will be AyaNovaLite.
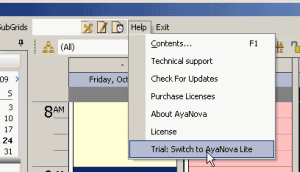
15. Now run AyaNova again - it will load with the AyaNovaLite database and showing the features of AyaNovaLite.
No login screen appears as AyaNovaLite is for one user on a single computer.
We recommend first following along with the tutorials to become familiar with AyaNova Lite's features
Important:
•The AyaNovaLite program files are installed by default to C:\Program Files\Ground Zero Tech-Works Inc\AyaNova folder
•The AyaNovaLite database file AYANOVALITE.FDB is installed by default to %AllUsersProfile%\AyaNovaData folder
•On a Windows 7 and newer computer, this usually is the C:\ProgramData\AyaNovaData folder
•On an older OS such as XP or 2003 computer, this usually is the C:\Documents and Settings\All Users\Application Data\AyaNovaData folder
•Refer to Backup & Restore for AyaNovaLite