Read through all instructions first before proceeding.
NOTE: These same single computer steps are also used in the initial steps on the server when first configuring for network use. Refer to Network Configuration for details on configuring AyaNova for network use.
If you are trying out AyaNova follow these instructions for stand alone setup, you can also try the network configuration later once you've evaluated AyaNova
1. AyaNova requires the latest Microsoft updates on your computer as well as Microsoft .NET Framework 4
2. If you haven't already, log into your computer as you normally do
•Note, if you perform any installation of AyaNova via remote access and encounter an issue, remove and repeat the steps when physically at the computer and not via remote.
3. Shut down any other programs before running setup.
4. Download the AyaNova installation file AyaNovaSetup.exe from the AyaNova web site http://www.ayanova.com/download.htm to a temporary folder on your hard drive
5. Double-click the AyaNovaSetup.exe file to begin the installation

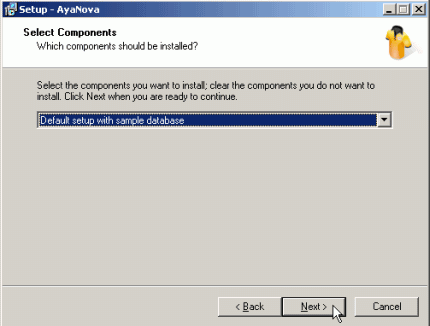
6. The default option is "Default setup with sample database". Click Next


NOTE: the network setup option is ONLY if you have performed the preceding steps as per the network steps for the specific AyaNova database server setup you are following (i.e. network Firebird Server, or network SQL Express or network SQL Server)
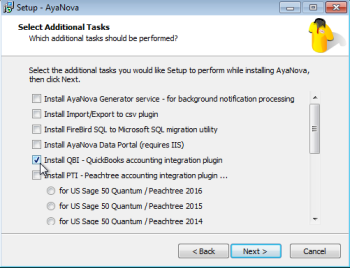
7. The installation shows additional AyaNova optional products you may be interested in trying out or using when installing the default stand-alone AyaNova.

If you are not installing any of the optional items skip to step 9.
•Refer to the QBI (QuickBooks interface) Help file for details on requirements (QBFC7.0, QuickBooks program also installed to the local hard drive, QuickBooks version compatibility etc) installation, and use.
![]()
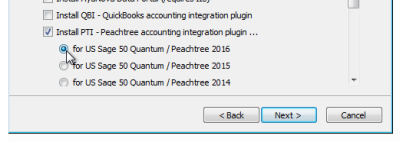
•Refer to the PTI (Peachtree interface) Help file for details on requirements (Peachtree program also installed to local hard drive, Peachtree version compatibility) installation and use.

•This installs client, part and unit import/export utilities. See also: ImportExport.csv utility
![]()
•This installs the Firebird to SQL database creation utility. You only need this installed on a server if configuring for network use with SQL Express or SQL Server
![]()
8. Once the installation completes successfully, you can now start the AyaNova program with the installed sample trial database
•Run AyaNova from the desktop icon
![]()
•Or run AyaNova from the Start -> All Programs -> AyaNova -> AyaNova menu option

9. When started, AyaNova will initially pre-load items it needs for faster access later.

10. The AyaNova login screen will appear.

•If just installed AyaNova, the AyaNova Administrator username and password will be pre-entered for you
•Test logging in as other sample users - see the Sample Users and Passwords for login names and passwords.
•Once AyaNova is licensed (either temporarily or with a paid for license) the fields will be blank for you to enter manually
Important:
•These same steps are also used when first configuring for network use. Refer to Network Configuration for details on configuring AyaNova for network use once this basic default installation is performed.
•The AyaNova program files are installed by default to C:\Program Files (x86)\Ground Zero Tech-Works Inc\AyaNova (or C:\Program Files\ if 32 bit) folder
•The AyaNova database file AYANOVA.FDB is installed by default to %AllUsersProfile%\AyaNovaData folder
▪On a Windows 7 or newer operating system, this usually is the C:\ProgramData\AyaNovaData folder
▪If you can not find the ProgramData folder, it may be that it is hidden. Usually to unhide, just Control Panel > Folder Options > View Tab > Select Show hidden folders or do a search online
▪On very old operating systems such as XP or 2003 operating system, this usually is the C:\Documents and Settings\All Users\Application Data\AyaNovaData folder
•Refer to Backup & Restore if using stand-alone single computer default installation