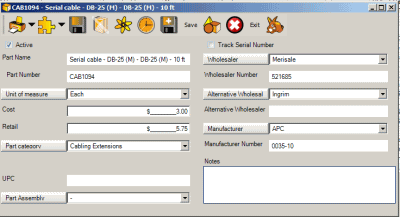
Part entry screen fields:
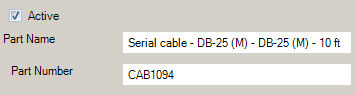
Active
If checked, this part will appear in the Parts grid screen, and be listed in Parts drop down selection lists such as in Service Workorder, Purchase Orders etc
If unchecked, this part will only appear in the Parts grid screen and would not be available for selection elsewhere
If you no longer want a part to be available for selection, un-check the Active field and save.
If the part was mistakenly created and no inventory has been set for it, no PO's made for it, no selection in any other AyaNova object - then you can delete it via the Delete ![]() menu option.
menu option.
Part Name
A short description of the part displayed for selection from drop down lists, handy when part numbers are not easily descriptive. Keep it short and in a format that the customer and AyaNova users can understand.
Part Number
This is a required field.
Usually the number used in your point of sale or accounting software. If you plan to integrate AyaNova with accounting software in future, or you presently integrate by entering invoices manually, you should be careful to enter part numbers exactly in the same format used in your accounting or point of sale software.
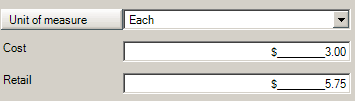
Identify the measure of the part - i.e. "each”, “box”, “case”, “dozen”, “gallon”, “feet”, “meter” etc
Cost
The currency amount you enter here will be available to the Service Workorders, Quotes and PM's where this part is selected.
Retail
The currency amount you enter here will show as the retail price in Service Workorders, Quotes and PM's where this part is selected. Do note that you can edit the amount in a service workorder, quote or PM if needed.
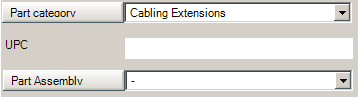
A way of grouping parts together for filtering or reporting on.
UPC
Entering the UPC code here will allow ease of use elsewhere in AyaNova. For example, if users are entering Parts in a Service Work order, they can select the UPC field and scan in the part using a bar code scanner which will automatically select the appropriate part. This adds up to saved time and less mistakes in entry.
A way of grouping parts together for filtering or reporting on.
Track Serial Number
![]()
This only affects if the Inventory module is in use (Use Inventory is set to True in Global Settings). If selected, every one of this Part that is in Inventory requires a unique serial number.
Tracking serial numbers is vital for warranties, recalls and service.
If check marked, when receiving this part via Purchase Order Receipts, it will automatically provide a serial number field to enter in the serial number for the number of received parts.
If check marked, when entering an Inventory Adjustment, it will automatically provide a serial number field to enter the serial numbers for parts being added to inventory, or a drop down selection serial number field to select existing serial numbers to remove from inventory.
If parts have serial numbers, when selecting a part used in service in a workorder item, the Serial Number field will display as selectable to select the actual serial numbers that are in inventory – preventing accidental incorrect entries in the workorder item.
Do note that you cannot change the checkmark on this field if this part has ever been entered into inventory with serial numbers.
NOTE:
•you can not set Track Serial Number field to True if there are parts already in inventory
•You first must remove the parts from inventory using a Inventory Adjustment
•Then you can change the Track Serial field in the part to True (checkmark)
•Now add the parts into inventory using a new Inventory Adjustment and as Track Serial is now selected, you will be asked for the serial number for each individual part quantity
Wholesaler
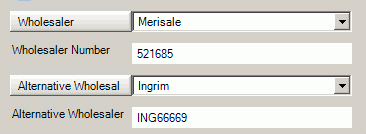
From whom you purchase the Part from. This may also be referred to as a distributor and as with all text you see in AyaNova you can change the localized text from Wholesaler to Distributor easily if necessary.
For a part to be ordered via a purchase order for that vendor, it must have that vendor selected as either the Wholesaler or the Alternative Wholesaler.
Setting this also allows you to take advantage of the Restock By Vendor feature in a purchase order where by setting the wholesaler for the part, you can obtain a list of all parts that are below the Minimum Stock Level and easily order without having to do a manual inventory count of what is needed to be ordered.
The drop down lists all available Vendors set as Wholesalers that a Part could potentially be associated with.
If the Wholesaler is not in the drop down list and no Wholesaler has been selected, then with the drop down selection list blank, click on the Wholesaler button to open up a new Vendor entry screen so that you can enter the Vendor details, save, close and then select it from this list.
Or if the Wholesaler is selected from the drop down list, you can open up the Vendor entry screen displaying that Vendor information by clicking on the Wholesaler button.
Setting the wholesaler allows you to use the time saving list of items that need to be reordered based on wholesaler and minimum stock level via the purchase order. This allows you to maintain optimum stock levels and keep your techs and customers happy.
Wholesaler Number
Number used by the Wholesaler in reference to this part. Provided here as may be different than your part number, allowing you to easily order by the Wholesaler number from within a Purchase Order
Alternative Wholesaler
Second distributor that part may be purchased from.
For a part to be ordered via a purchase order for that vendor, it must have that vendor selected as either the Wholesaler or the Alternative Wholesaler.
The drop down lists all available Vendors set as Wholesalers that a Part could potentially be associated with.
If the Wholesaler is not in the drop down list and no Wholesaler has been selected, then with the drop down selection list blank, click on the Wholesaler ID button to open up a new Vendor entry screen so that you can enter the Vendor details, save, close and then select it from this list.
Or if the Wholesaler is selected from the drop down list, you can open up the Vendor entry screen displaying that Vendor information by clicking on the Wholesaler ID button.
Alternative Wholesaler Number
Number used by the Alternative Wholesaler.
Manufacturer

This would be who makes the part. This is another way of grouping parts.
The drop down lists all available Vendors set as Manufacturer that a Part could potentially be associated with.
If the Manufacturer is not in the drop down list and no Manufacturer has been selected, then with the drop down selection list blank, click on the Manufacturer button to open up a new Vendor entry screen so that you can enter the Vendor details, save, close and then select it from this list.
Or if the Manufacturer is selected from the drop down list, you can open up the Vendor entry screen displaying that Vendor information by clicking on the Manufacturer button.
Manufacturer Number
This is the number used by the Manufacturer and is another way of identifying the part.
Notes
This is where you can enter additional notes about this part if needed.
See also: