Invoice descriptive text
When you use QBI to invoice out billable items from an AyaNova workorder into a QuickBooks invoice, you could print a workorder report from AyaNova and physically provide the report along with the QuickBooks invoice. This is often the best option for shops that need to provide a very detailed work order report with a lot of data on it.
OR you could specify Descriptive Text to show on the QuickBooks invoice - which is text from the AyaNova workorder that was billed out. This is a good option if you typically don't have much detailed information on a work order that needs to be provided to the Customer with the invoice.
You can set as much or as little descriptive text about the service workorder(s) to display on the QuickBooks invoice.
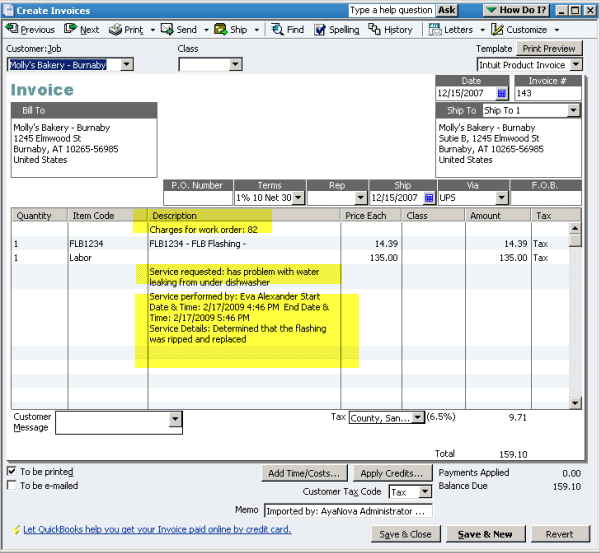
For example, the screenshot below shows that this invoice has the additional descriptive text from the workorder identifying the following:
-
what AyaNova workorder number the invoice is for
-
text from the AyaNova workorder item summary
-
and details about the labor service provided
How to edit the descriptive text template
Open the form
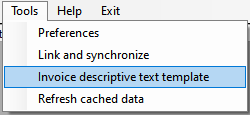
Use the "Invoice descriptive text template" menu option from the main menu:
to open the "Invoice template builder" form:
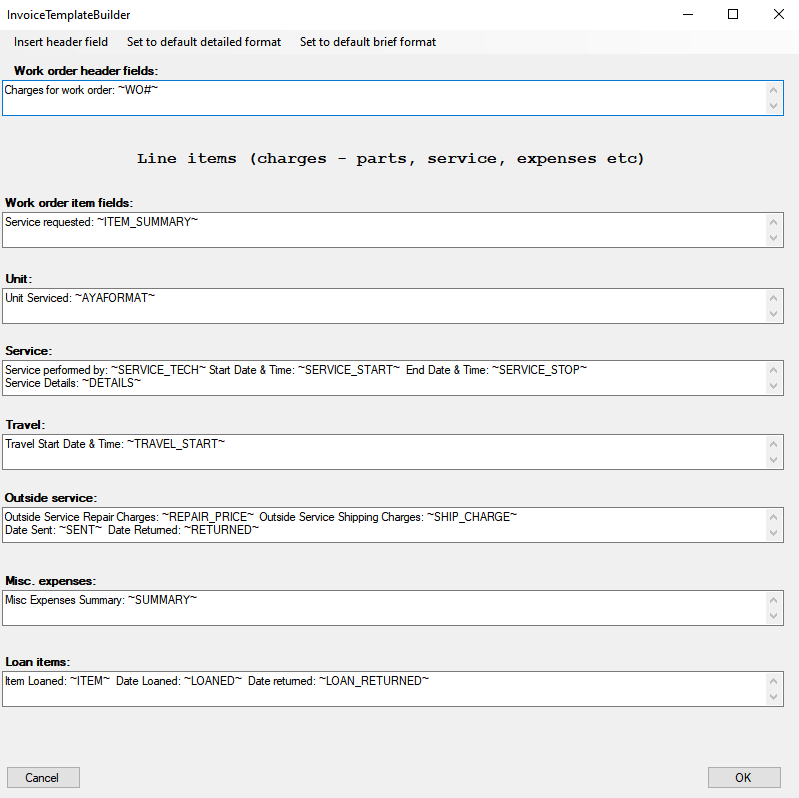
Here each section of a work order is represented with individual template that can be set when you want to include data from that section of the Work order.
You can manually edit a template or select from two predefined formats. You might find it easier to start with a pre-defined format and then edit to customize it further for your needs.
Use default "Brief" format
To display just the text "Charges for the workorder:" and the workorder number from the work order header fields, select the menu option Set to default brief format.
This is useful so that the Customer can have a reference to an included Detailed Service Workorder report you have printed out to include with the QuickBooks invoice - especially if you have a lot of detail in the service workorder which the QuickBooks invoice may span many many pages to display.
Or, in some cases this is all the information required to provide to the Customer and no separate work order report is necessary depending on your needs.
Making this selection will automatically replace any previously set template fields completely.
Use default "Detailed" format
If you do want the QuickBooks invoice to display text about everything billable from the service workorder, then select the menu option "Set to default detailed format".
QuickBooks invoices are very limited in the amount of text that can display, so your invoice may span multiple pages. It is up to you to test what descriptive text meets your needs.
Making this selection will automatically replace any previously set template fields completely.
Manually editing the template
You can edit specifically what text you want to display and what data from the AyaNova service workorder by placing your cursor within the text area, entering any "static" text required, and then select the menu option Insert xxxxx field (where xxxxx will be the section of the AyaNova service workorder it corresponds to).
Do not manually type in data field tokens for an incorrect section - for example, do not enter ~WO#~ in the Unit: text area field, it will be ignored.
The appropriate tokens for each area are available from the menu options at the top of the form displayed when clicking into that area's text editing box.
Selecting a menu option will insert a token that will be substituted with data from the AyaNova work order when the invoice is generated.
Many ~tokens~ are available that correspond to what you would see in the AyaNova User interface when viewing that particular section of a Work order.
For example, let's say if a specific unit in a workorder item was selected for service, you want the following to display on the QuickBooks invoice:
Name of serviced equipment: Units name
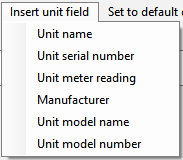
Click in the Unit: text area and you will note that the menu changes to Insert unit field:
Type in the text (and/or replace the existing text and data fields) you want to display.
Then select the menu option Insert unit field: to drop down the list of selectable data fields from the Unit section of the service workorder and select Unit name
Note how the ~UNIT_NAME~ is inserted into that text area.