Global settings

The global settings form is used to control Business settings, general User interface settings and Customer access.
(Technical settings that control how the AyaNova server operates are separate from business settings and are documented in the Server operations section of this manual)
Authorization Roles required
Many roles can select this object on other records where approriate. Editing or viewing this object in detail is only available to Users with the following roles:
Full access
- Business administration
Read only access
- Business administration - restricted
How to access Global settings
From the Administration navigation drawer select the Global settings navigation item.
Business settings
Default parts purchase tax
Default tax to apply on purchase orders. Leave empty if you do not want a value to be automatically selected on new records.
Default service sales tax
Default labor tax to apply for Labors and Travels on Work orders, Quotes and Preventive maintenance orders. Leave empty if you do not want a value to be automatically selected on new records.
Default parts sales tax
Default tax to apply for Parts and Loaners on Work orders, Quotes and Preventive maintenance orders. Leave empty if you do not want a value to be automatically selected on new records.
Filtering is case sensitive
Default is unchecked / false. When checked / true, AyaNova will treat all autocomplete list controls and data table filters as case sensitve for matching.
Use inventory
If set to TRUE, able to use Purchase Orders, Receipts, view Inventory Status, make Inventory Adjustments, and request order of Parts within service workorders. If set to FALSE, only able to enter Parts, and select Parts without affecting inventory. No inventory will be tracked.
NOTE: Changing Use Inventory to False, entering a quantity of parts in workorders, and changing Use Inventory back to True can result in on-hand amounts becoming out of synch as inventory is not tracked when set to False. If you do this, you may need to make Inventory Adjustment entries to adjust for the inconsistencies of parts entered in workorders where inventory tracking was not in use.
Default Work order completion age
When this value is set it will cause AyaNova to automatically set the Complete by date on new work orders if there is no other higher precedence source of completion age.
When an event takes place that would affect the Work order Complete by date (such as saving a new Work order or selecting a Contract manually or changing the Customer) the Work order update process (when you click save) at the server will automatically attempt to set the Complete by date by consulting various sources.
The order for what source is used to set the Complete by date automatically is:
- Manually set Complete By date already set takes the highest precedence and will always be used if found pre-set on a new work order when it is saved
- If no manual date is found then the Work order's Contract will be used if that Contract has a minimum response time set
- If there is no Contracted response time then this Global setting value will take effect and if there is no Global default work order completion age set then it will default to leaving the Work order Complete By date empty
Allow schedule conflicts
If the "Allow schedule conflicts" setting is unchecked (set to False) then a work order item scheduled user record can not be saved if there is a schedule conflict for that User. AyaNova will check to see if that user is already scheduled in an overlapping portion of the same time period.
The default for this setting is false / unchecked to allow schedule conflicts.
This setting is ignored when a work order is automatically generated from a Preventive maintenance order.
Scheduled / Labor default minutes
This setting when not set to zero is used to automatically calculate end date and times and quantities on Labor or Scheduled user records on Work orders, Quotes and Preventive maintenance orders.
This applies to new records only; once the labor or scheduled user record is saved this setting has no effect when changes are made to that records start or stop date/time.
When changing the start date / time on a new record the end date / time will automatically be set to the start date/time plus the number of minutes in this setting. In addition the quantity will be set also to the number of minutes in this setting.
when changing the stop or end date / time on a new record the start date / time will only be automatically adjusted if it has no value currently set.
To turn this setting off set it to zero.
Travel default minutes
This setting when not set to zero is used to automatically calculate end date and times and quantities on travel records on Work orders, Quotes and Preventive maintenance orders.
This applies to new records only; once the travel record is saved this setting has no effect when changes are made to that records start or stop date/time.
When changing the start date / time on a new record the end date / time will automatically be set to the start date/time plus the number of minutes in this setting. In addition the quantity will be set also to the number of minutes in this setting.
when changing the stop or end date / time on a new record the start date / time will only be automatically adjusted if it has no value currently set.
To turn this setting off set it to zero.
Set next seed number
Seed numbers control how automatic serial numbers are assigned to work orders, preventive maintenance orders, Quotes and PO's.
The automatic sequence starting number can be adjusted and has it's own documentation page.
Company information settings
Enter your company contact information here. The stock AyaNova report templates will use the values here for various reports.
User interface settings
Business logos
This button will take you to the business logo form where you can upload various sized logos. Logos are displayed on login forms and the stock AyaNova report templates if set. You do not need to upload a logo however it's strongly recommended if you are going to give your Customers access to AyaNova so they are confident they are in the right place.
A good starting point for sizes are:
Small150 pixels wide by 50 pixels highMedium300 pixels wide by 100 pixels highLarge600 pixels wide by 100 pixels high
It is not mandatory they be those sizes or formats, it's what is used in testing and development so most likely to fit properly.
The small logo is the most commonly used on reports and the small and medium are most commonly used for the login form logo depending upon the size of the device's screen in use. The large logo is not currently used for any stock report templates however it's available to any report template if required or can be used as an alternative logo for reports if required.
Autocomplete list templates
Searchable autocomplete lists are used throughout AyaNova for areas where you need to select another AyaNova object on a form, for example selecting a Customer on a Work order or a Part on a Purchase Order.
The AUTOCOMPLETE LIST TEMPLATES button will take you to the autocomplete list templates form where you can configure what information is displayed in autocomplete lists for each object type depending upon your specific requirements.
These templates allow you to control which fields from the source object are displayed and searched in that type of objects autocomplete lists.
Note that this setting affects autocomplete lists only for searching and identification purposes, not how names of objects are displayed generally in AyaNova forms or on reports. These templates are for the Users to help them more quickly select objects.
Autocomplete list templates are Global and apply to all users of AyaNova.
In the template form you can select the sources of information that are displayed in each autocomplete list and the order in which they are displayed. You can also turn on or off Tags for each object.
The fields you select will be the ones searched when typing characters into a autocomplete list to limit the list to the desired selection so the choice of which fields to show serves multiple purposes.
Customer signature
These optional settings control what text is displayed as prompts to the Customer in the signature form of a Work Order
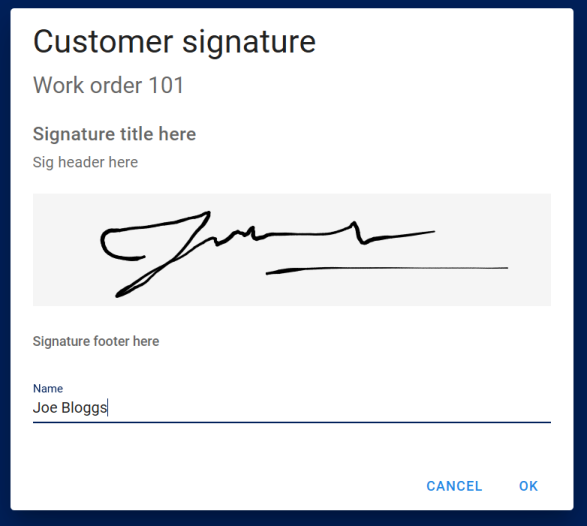
Any one or all of these fields can be left blank as appropriate.
Customer access settings
This section controls the rights granted to Customer / Head Office type Users (known as "Contacts") who log into AyaNova using their Customer / Head office Contact User account for self service Customer login options.
Customer / Head Office Contacts do not automatically have access to login to AyaNova, they need to have a password and login set up for them initially, once they can login, these settings control specific access to features.
To grant a Customer the ability to login they will require a Customer / Head Office User account.
Customer contact Users
Contacts of a Customer are able to access information for that Customer unless further restricted by tags.
Head office contact Users
A Contact of a Head office is able to access information for all Customers of that Head office unless further restricted by Tags.
Common settings for customer access features
Active - most customer feature access settings have an Active checkbox control which, when checked, grants access to that specific feature to all Customer / Head office Contact users who can login.
Tags - all customer access features can be further restricted by Tags so that only a specfic subset of all Customer / Head office Contact users are allowed access to that feature. Tags are matched to any single matching tag in the selected tags. This means the tags "red, green, brown" will match to a Contact tagged with any one of "red", "green" or "brown".
For example when a feature has a Tag selection control labelled "Restrict to Contact, Customer or Head Office with any of these tags" this means that if any one single tag in that Tag selection control also is set on that Contact, their Customer or Head office objects then they have access to that feature.
Any Contact users who do not have that tag set to them or their Customer or Head office objects will not be able to use that feature (or even see it).
This means you can grant control via tags down to a single Customer / Head office Contact only, or a Head office of multiple Customers or Customer by Customer as appropriate to your business.
Note that tagging a Head office will grant rights to a Customer contact when it is that Customer's Head office, in other words granting specific rights by Tag on the Head office "trickles down" to the Contacts of the Customer of that Head Office, not just Head office type Contacts.
Customer Service Requests
This feature gives the Customer the ability to view a list of past Customer service requests as well as make new ones.
Message to customer
This field sets the optional prompt message displayed to the Customer in their Customer Service Request form to provide specific instructions to Customers when they fill out Customer service requests. It is displayed as plain text at the top of the CSR form.
Allow Customer to create Unit
Controls whether a Customer can directly add their own Unit or not with further restriction by Tags.
Work orders
This feature gives the Customer / Head office Contact the ability to view a list of past Work orders as well as optionally allow them to access the Wiki, Attachments and download Work order reports.
Turning on this feature gives Customer / Head Office Contact Users access to a data table of their own work orders and further settings below give further access beyond the table.
Customer work order report
This feature allows a Customer / Head office contact to view / download a Work order report. The User does not have a choice of Work order reports, they automatically get one based on the selections made in this section. The specific report is determined automatically at the server in the following order: Tag specfic reports first, if more than one tag matches then the highest matching tag (from top to bottom of the list) is chosen, if no Tag reports are a match then the Default report is chosen, if no Default was chosen and no tags match then they are not offered the Report option.
Default work order report
This field sets which Work order report is available by default, leave blank to disable default work order report availability to all Customer / Head office Contact Users.
Tag specfic Work order reports
These fields allow for providing a specific work order report to Customers or Contacts with specific tags. Head office tags are not considered for this particular feature.
This is useful in situations where you would like to provide an alternative work order report to certain Customers only.
Tags are evaluated to match from the top of the Tag / Report combination list down to the bottom; as soon as a match is made no further Tags are checked so the highest ones have the highest priority.
Any one tag is enough to make a match regardless of how many tags are selected here or on the Contact, Customer or Head office.
View Work order header WIKI
This allows a Contact read only access to the Wiki section of the Work order Header (i.e. the main Wiki of the entire work order not in any other deeper parts of the Work order where a Wiki can be set). The Tags control can be used to restrict this feature to specific Contacts, Customers or Head Offices only.
Open Work order header attachments
This allows a Contact read only access to the Attachments section of the Work order Header (i.e. the main Attachments area not in any other deeper parts of the Work order where attachments can be set). The Tags control can be used to restrict this feature to specific Contacts, Customers or Head Offices only.
User settings
This feature gives the Contact access to their own User account settings where they can set their personal account settings such as notification email address, login name and password, locale settings etc.
Notification subscriptions
This feature controls which (if any) Customer centric notifications are available to Contacts. It does not subscribe them to that particular notification, it allows them to subscribe themselves to that notification. If none of these are available they will not be offered the Notification subscription form.
Notification "Service reminder"
Allow Contacts to subscribe to notified when service is upcoming for their own work orders.
Notification "CSR Accepted"
Allow Contacts to subscribe to be notified when their Customer Service Request has been accepted for service.
Notification "CSR Rejected"
Allow Contacts to subscribe to be notified when their Customer Service Request has been rejected for service.
Notification "Work order created"
Allow Contacts to subscribe to be notified when a new Work order for them is created.
Notification "Work order completed"
Allow Contacts to subscribe to be notified when a Work order for them is set to a Completed status.