Guided tour: Custom fields
In this guided tour we'll add some Custom fields on a Customer edit form.
This tour relies on a custom Translation already in use so if you are following along and making changes and haven't already made a custom Translation you should take the Custom Translation tour first then come back here.
If you're reading through the tour without making changes then you don't really need to take the Custom Translation tour first.
The same technique you learn here applies to any other type of form in AyaNova.
AyaNova has a lot of fields built in for each object but sometimes you need to enter and track something that AyaNova doesn't include.
AyaNova has a built in Custom fields feature for exactly this situation.
Adding Custom form fields applies to all users of AyaNova equally.
The screen shots will show how AyaNova looks on a PC or tablet, if you are using a narrow screen device such as a smart phone your view will be slightly different but the functionality is the same.
If you don't already have AyaNova available to follow along, everything you need to get started is available here: Try AyaNova now.
1. Login as a user with permission to modify form fields
In AyaNova a User needs permission to view and make changes to objects, this permission is called an Authorization role in AyaNova and an administrator grants permissions to each User as required.
Only a User with the Business administration role can customize forms and add custom fields.
For this tour you must login as a User with that Role.
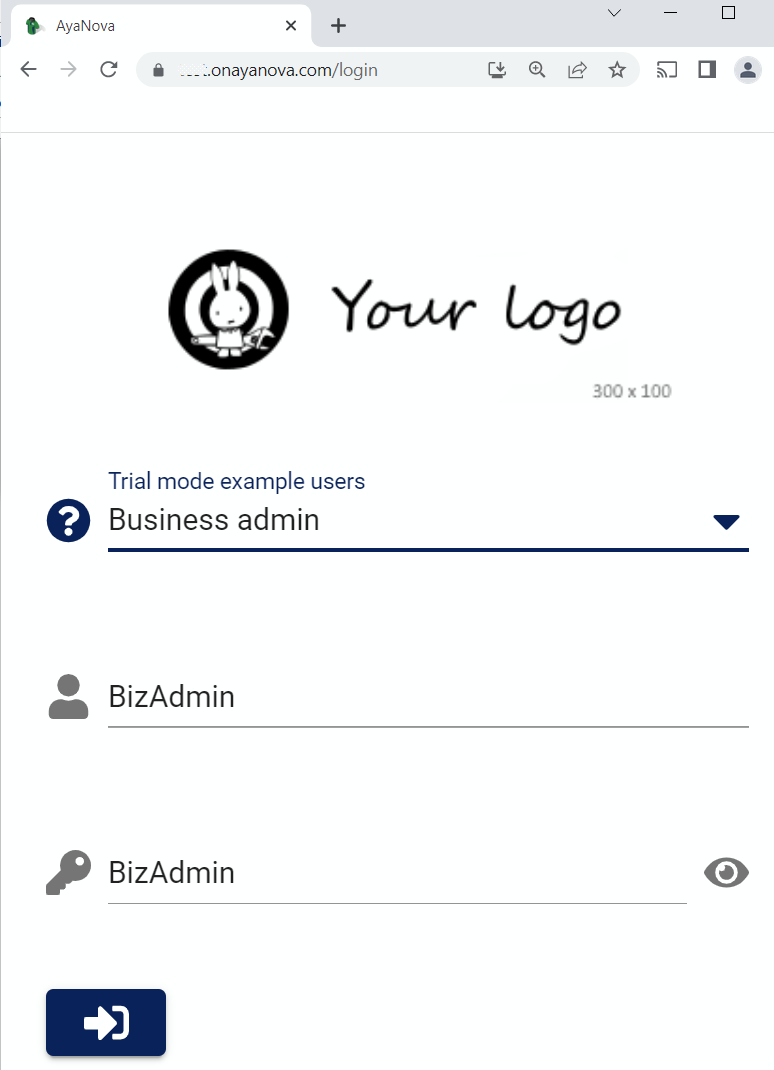
If you are using generated AyaNova sample data, we've provided a sample User for each type of Role so for this tour you should login as the Business Admin / BizAdmin sample User to follow along:
2. Open a Customer edit form
Edit forms are customized from the type of form you want to edit.
When you are logged in as a BizAdmin role User a Customize menu option will appear in any form that can be Customized.
The Customize option is now available in new, empty records so you need to open an existing record to get to that option.
So the first step is to get to a Customer's edit form, it doesn't matter which Customer, any one will do.
Navigate to an area of AyaNova where Customers are displayed in their data table. There are a few different ways to get there but we'll use the simplest one for this tour and open a Customer from the Customers data table list.
Click on the "Hamburger" icon
In AyaNova the main way to navigate around is by using the navigation drawer which is an area that slides out on screen to choose where you want to go.
When logged in you can access the navigation drawer from what is commonly known as a "hamburger" icon (highlighted below) because it looks kind of like a hamburger:

Click on the hamburger icon to show the navigation drawer.
Navigation drawer Customers items
In the image below you can see the options available to the sample "Business admin" User generated by AyaNova. Users with a different set of Roles will see different options here.
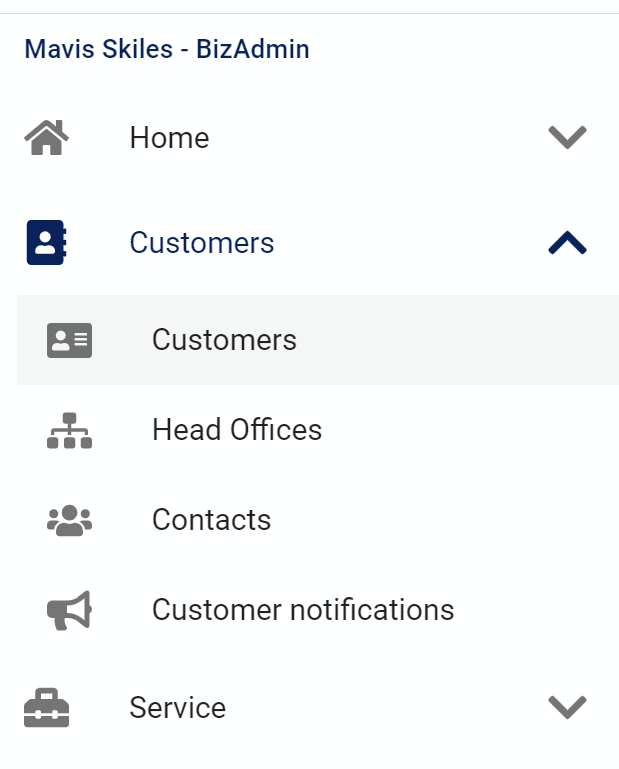
The area we want is "Customers" and the sub item also "Customers" so go ahead and click on that to cause AyaNova to navigate to the list of Customers previously entered in AyaNova:
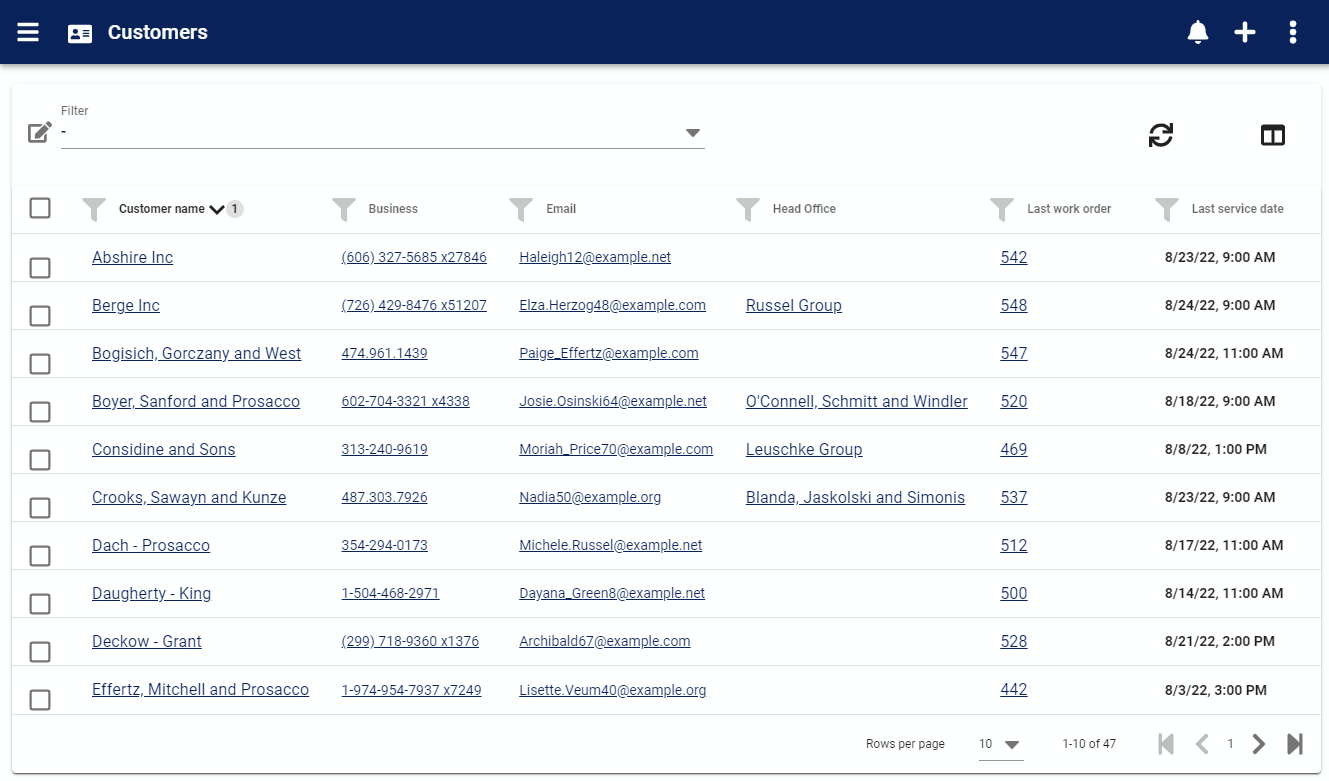
This list is known in AyaNova as a "Data table", data tables are used in many places in AyaNova for different kinds of objects. Data tables have many features and options to control what is displayed and how it's displayed so you can restrict the view to show only what is important for any given task.
Open a Customer record
Now click on any Customer's name in the list to open their record in the Customer edit form.
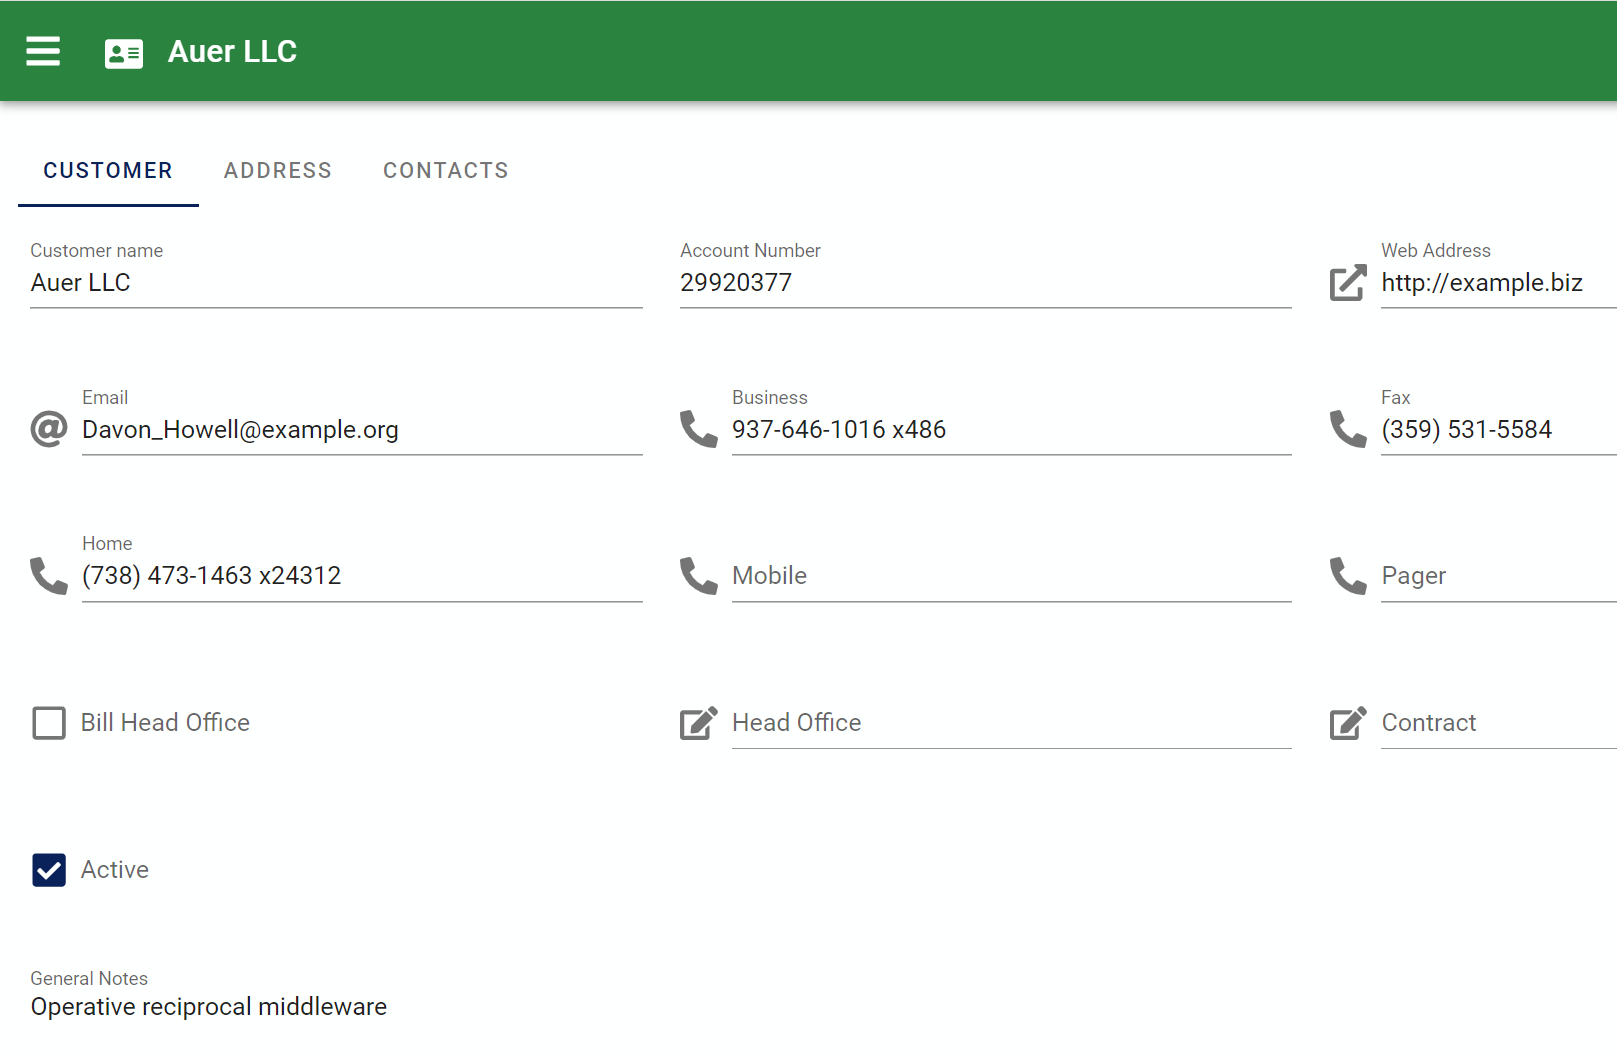
In the image above we can see the top part of a Customer edit form. We'll stick with the top part so the images are easier to see in this manual but the steps apply to a field anywhere on a form.
3. Customize
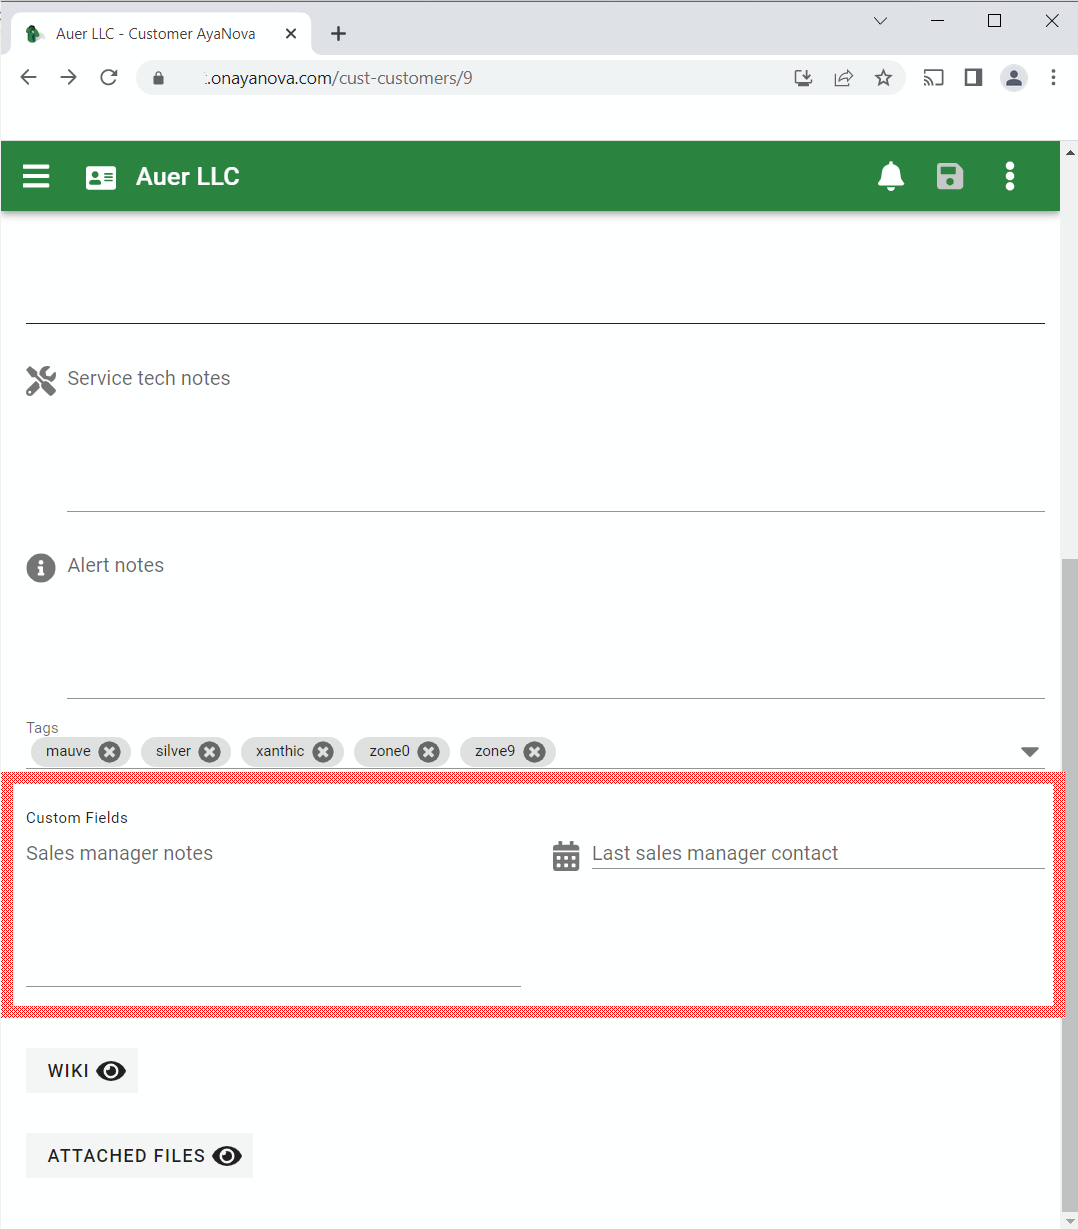
We've decided that our company now has a policy of having a sales manager contact each Customer regularly and find out how we're doing and see if there is any new business we can provide so we're going to add a text field called "Sales manager notes" and a date field called "Last sales manager contact" for this example.
Click on the menu button in the top right of the form. We're logged in as a Business Administration role user in step 1 so when we open the menu on a form we see a Customize option:

If you don't see a Customize menu option it means you're either not logged in as a User with the permission to customize forms or you are in a new empty record and haven't opened an existing record as required for customization.
Go ahead and click on Customize now to open the form customization interface:
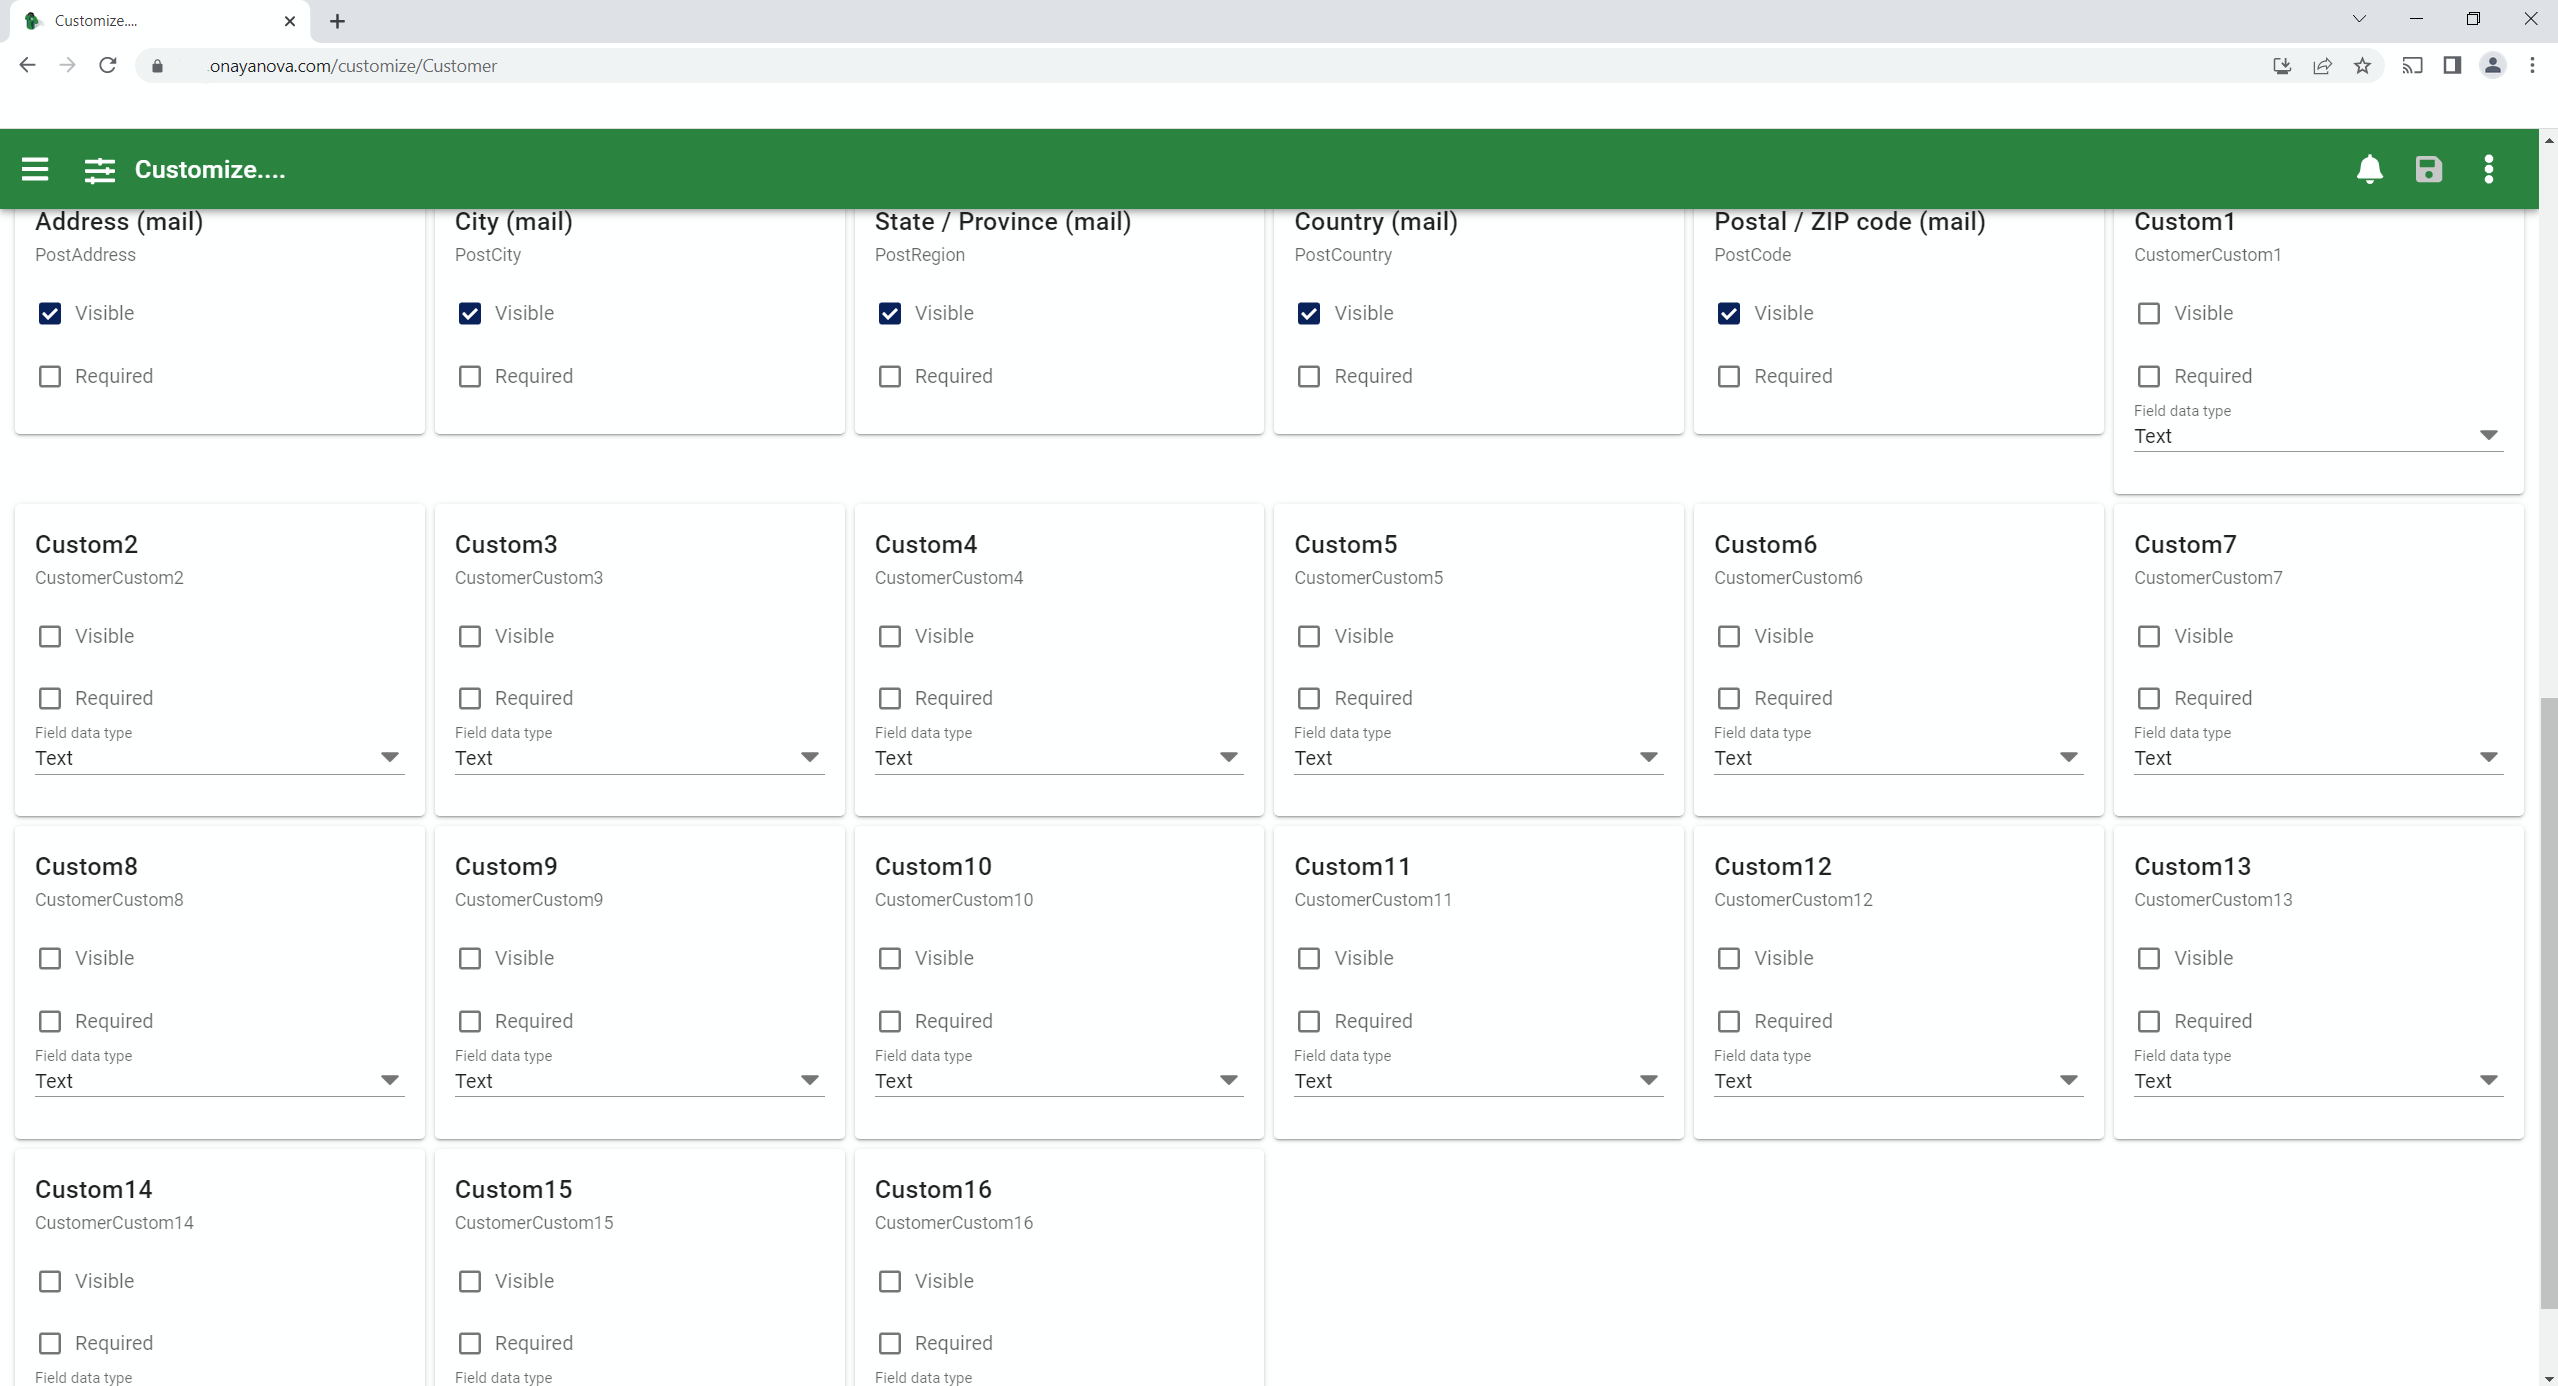
In the image above you can see boxes representing each field that can be customized on this form. The Custom fields are located after the stock fields that come with AyaNova and are labelled Custom1 to Custom16.
In the image we've scrolled down so you can see the Custom fields available.
The title at the top of each box shows how it displays in your current language on the form you just came from. Below that is the translation key
In this form you can do other things besides require fields for example making a field hidden (tour) or required (tour).
For this tour we're going to enable a couple of Custom fields and set their data type appropriately.
Custom fields show on the form when their Visible property is checked and the type of control displayed is set by the Type property.
We want a Text field for our Sales manager notes and a Date field for our Last contact fields.
Since no Custom fields are currently enabled we'd normally use Custom1 and Custom2 for this purpose but for this tour to make the screen shots smaller we'll use Custom2 and Custom3. It doesn't actually matter which ones you use as long as you remember the field number you used for a later step.
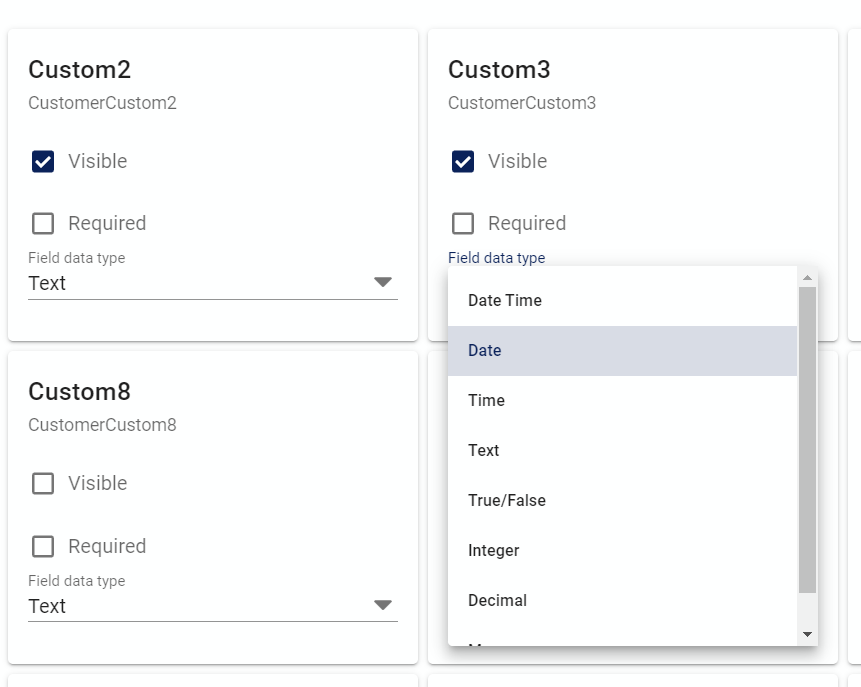
In the image above you can see we've set Custom2 to visible and of type Text and are setting Custom3 to type Date only.
Note also the translation key below the name of each field; "CustomerCustom2" and "CustomerCustom3". We're going to need that information for the next step.
At this point we'll click on the save button to save our customization and click on our browser's back button to go back to the Customer form just to confirm we can see our newly enabled Custom fields:
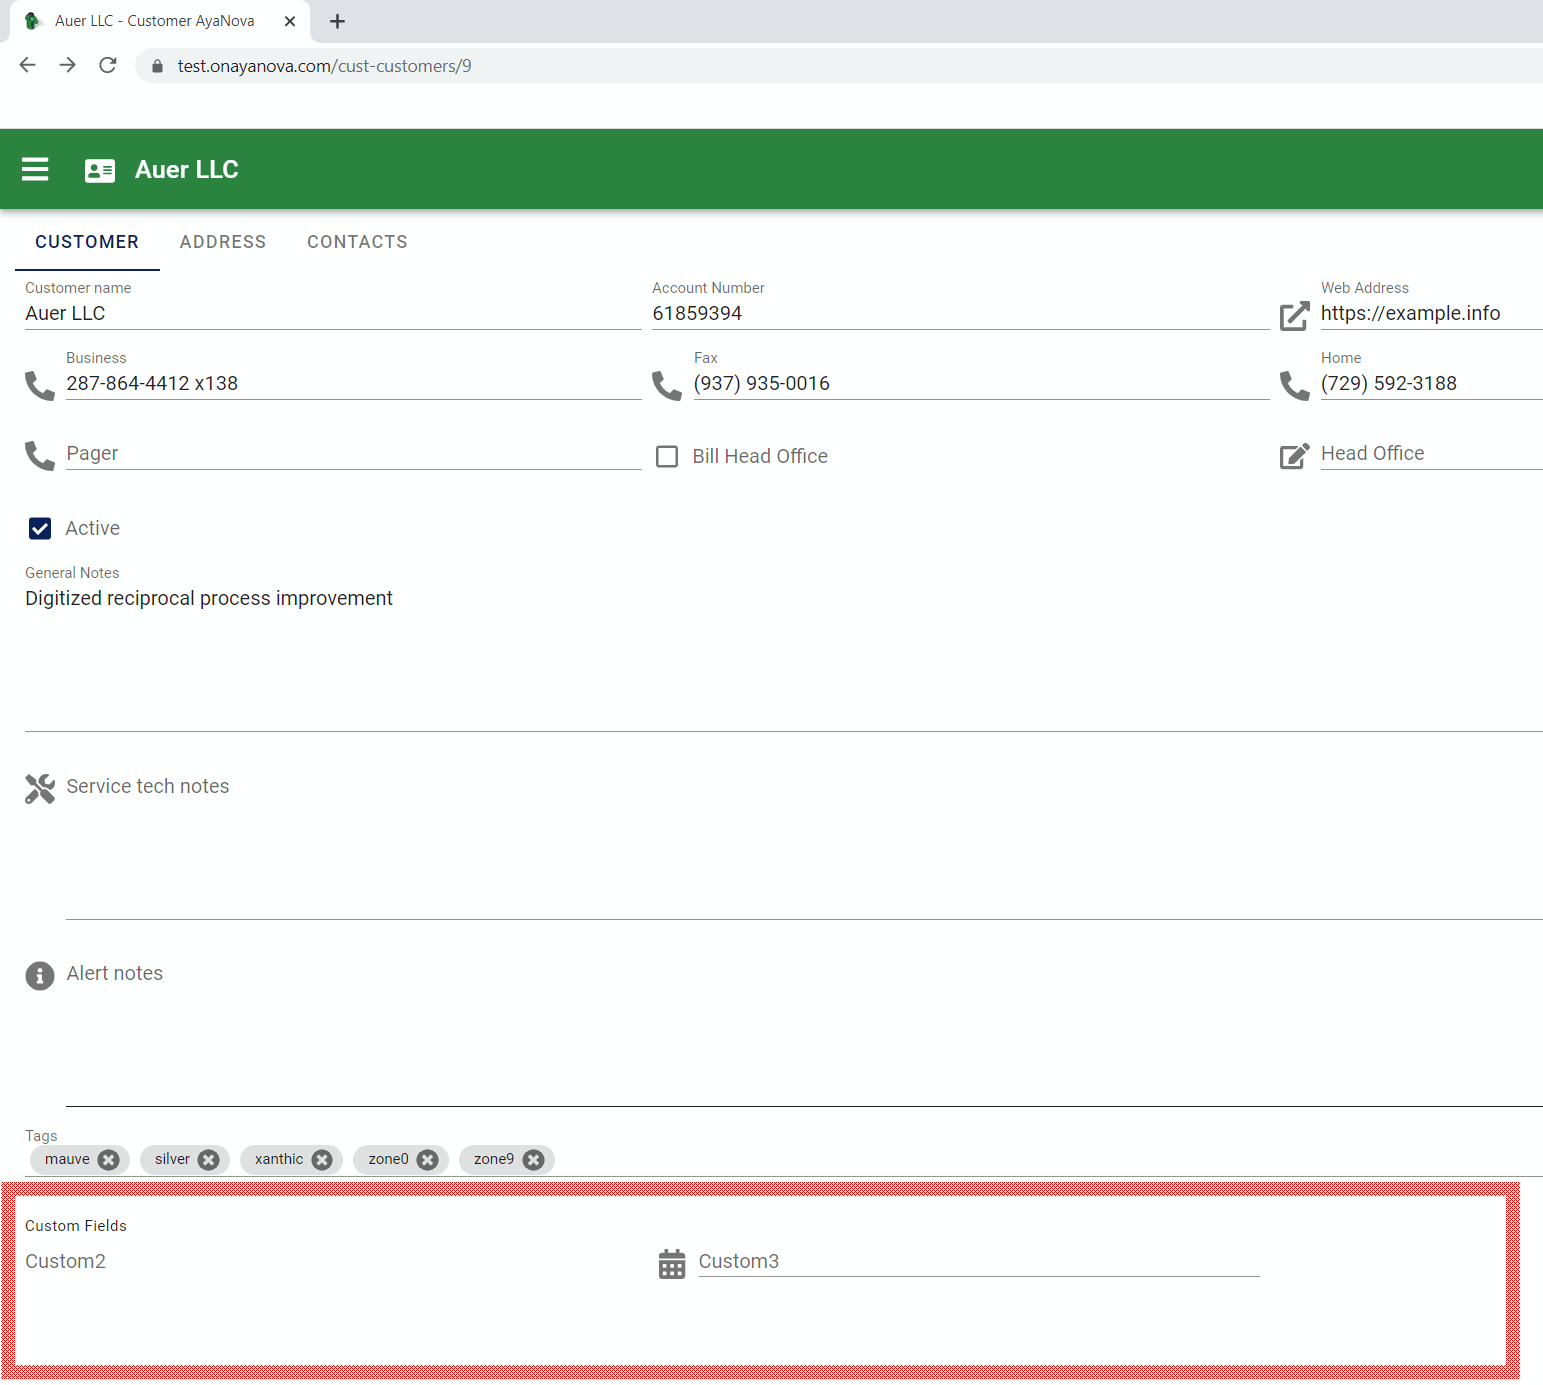
The fields are now there and ready for input but they need to have a title that explains what type of data is supposed to go there.
We need to set these titles in the Translation form in our Custom Translation we previously created in a previous tour.
Let's navigate to the Translations form now, there's two ways to get there:
One way is by opening the Customize form again and using the Translation menu option:
Or by using the Navigation drawer to go to Translations:

Here we can see the stock Translations and any custom Translations created previously:
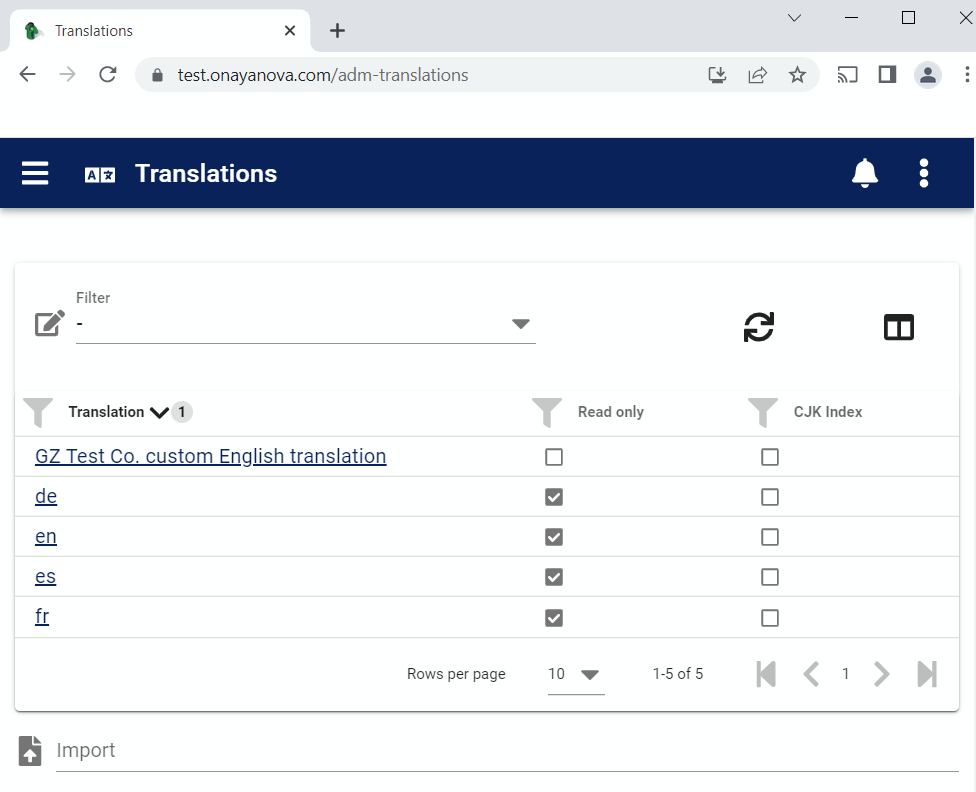
We'll go ahead and open our custom translation all our Users are set to use:

In a previous step we identified the Translation keys we want to change as being "CustomerCustom2" for the text field and "CustomerCustom3" for the date field.
We could click through each page of the translations until we get to those fields but it's much faster to just search for them:
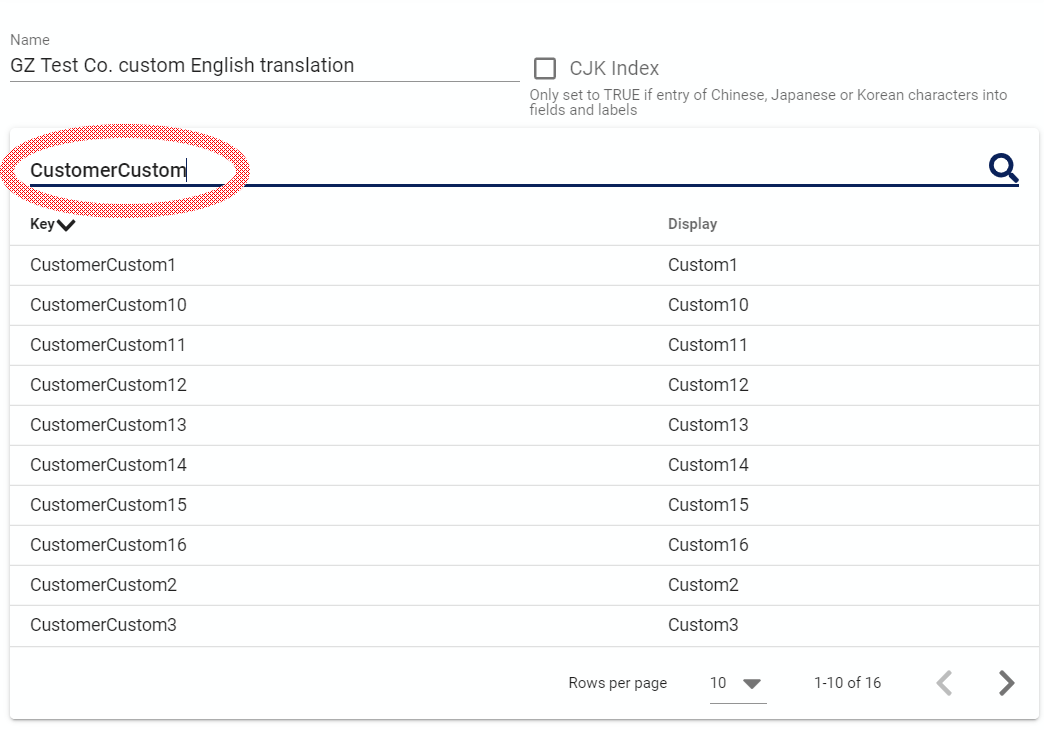
Here we typed in "CustomerCustom" in the search box which restricted the list to matching fields.
We can see the two fields we want "CustomerCustom2" and "CustomerCustom3" at the bottom of the list.
We'll click on the "Custom2" text in the Display column to edit this field and type in the display text we want to show:

Then click on OK to save the change and do the same for the "Last sales manager contact" (Custom3) field, click on OK and see our changes:

The changes are made here temporarily but not saved yet so we'll click on the Save button at the top of the custom Translation edit form to save the changes to the server for all Users.
We'll return to the Customer edit form and see our changes in action. Since we were the User that made the translation changes and we're using the Translation we changed we don't need to logout and back in to see them like other User's would need to, we can see it right away.
The fastest way to get back to the Customer edit form is to use our browsers back button repeatedly until we see the form we want:
Our Custom fields are complete and ready for use.
Other users
Other Users will see the Custom fields the next time they open the form that was customized however they will see them with the Titles that were present for those Custom fields at the time they logged in, so they will need to log out and back in to see the proper titles you set in the Translation.
It's best to enable custom fields in coordination with the other Users or after hours so they don't see a field appear without the proper title above it and get confused.
Reporting and printing Custom fields
If you want to generate reports that contain the custom fields added you can do that via the report template editor.
Disable custom fields
If you no longer require the Custom fields you can set them to hidden in the Customization form; previously entered data will remain in place but the fields will no longer show on the form, they will need to be manually removed from reports if enabled there.
What about previously entered records?
Previously created records will just be empty in the custom fields enabled until filled in.