Guided tour: Create a work order
We recommend having a look at the forms overview guide before taking the guided tours.
In this guided tour we'll create a simple labor only work order that records the details of service and the hours to be billed.
The screen shots will show how AyaNova looks on a PC or tablet, if you are using a narrow screen device such as a smart phone your view will be slightly different but the functionality is the same.
AFter the work order is created we will print a Customer Invoice format work order report.
If you don't already have AyaNova available to follow along, everything you need to get started is available here: Try AyaNova now.
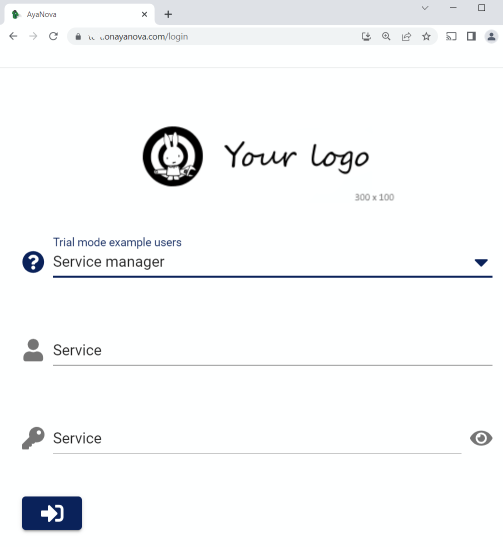
1. Login as a user with permission to make a work order
In AyaNova a User needs permission to view and make changes to objects, this permission is called an Authorization role in AyaNova and an administrator grants permissions to each User as required.
Many User roles can access Work orders and change various parts of them but the Roles with the highest level of access to change and view all areas of a work order are a User with the Business administration Role or a User with the Service manager Role.
For this tutorial you should login as a User with one of those Roles.
If you are using generated AyaNova sample data, we've provided a sample User for each type of Role so for this tour you should login as the Service manager sample User to follow along:
2. Open the Service work orders list
Once you are logged in you need to navigate to an area of AyaNova where Work orders are displayed and entered. There are a few different options to do that but we'll use the simplest one for this tutorial and create the work order from the Service Work orders list.
Click on the "Hamburger" icon
In AyaNova the main way to navigate around is by using the navigation drawer which is an area that slides out on screen to choose where you want to go.
When logged in you can access the navigation drawer from what is commonly known as a "hamburger" icon (highlighted below) because it looks kind of like a hamburger:

Click on the hamburger icon to show the navigation drawer.
Navigation drawer Service items
In the image below you can see the options available to the sample "Service manager" User generated by AyaNova. Users with more Roles will see more options here and vice versa.
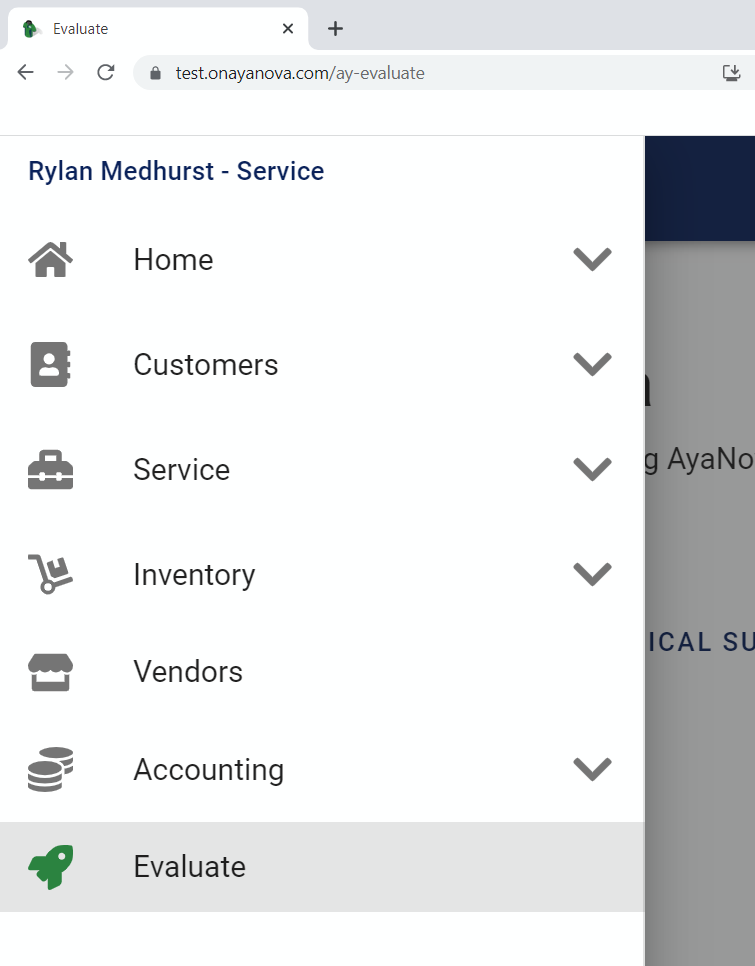
The area we want is "Service" so go ahead and click on that to reveal all the Service navigation area options available to this User:
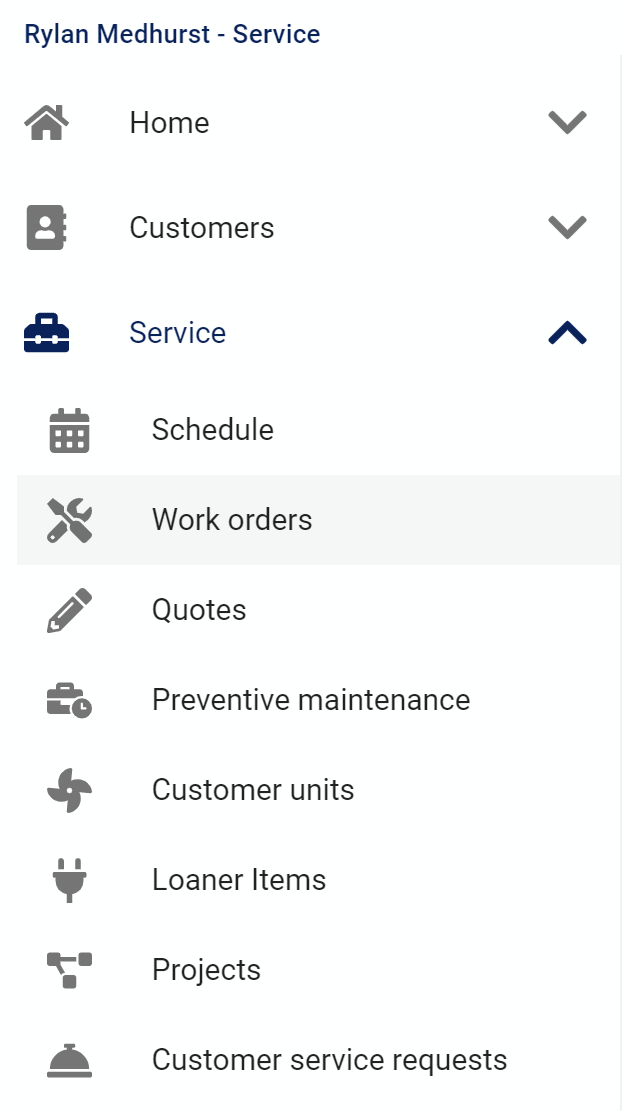
Open the Work orders list
Clicking on "Work orders" will cause AyaNova to navigate to the list of previous Work orders entered and saved previously in AyaNova:
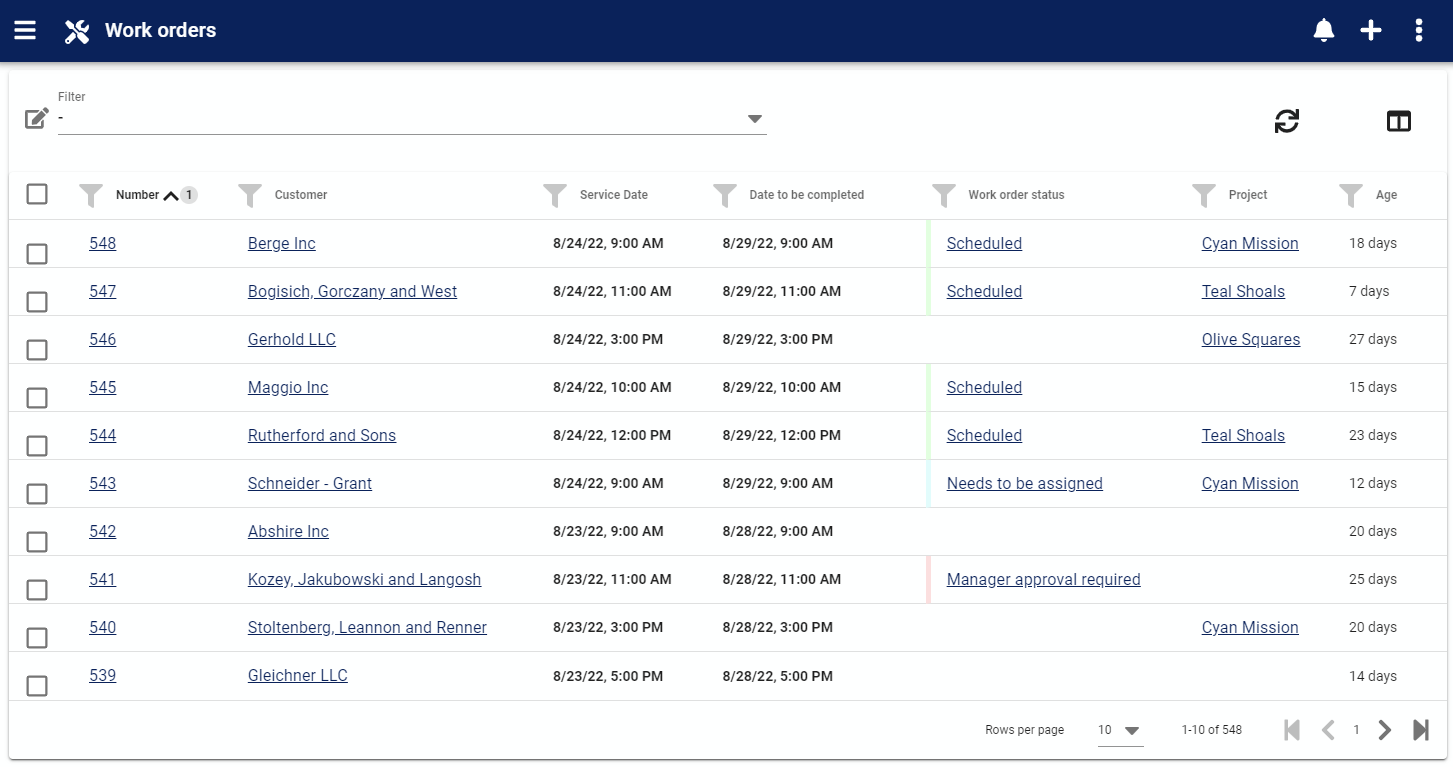
This list is known in AyaNova as a "Data table", data tables are used in many places in AyaNova for different kinds of objects. Data tables have many features and options to control what is displayed and how it's displayed so you can restrict the view to show only what is important for any given task.
3. Create a new empty Work order
Because the currently logged in User has rights to create a work order the create new record button is available above and to the right of the list of work orders:

Anywhere you see this icon you can create a new record for that type of object.
Click on the create new record button to open a new empty work order:
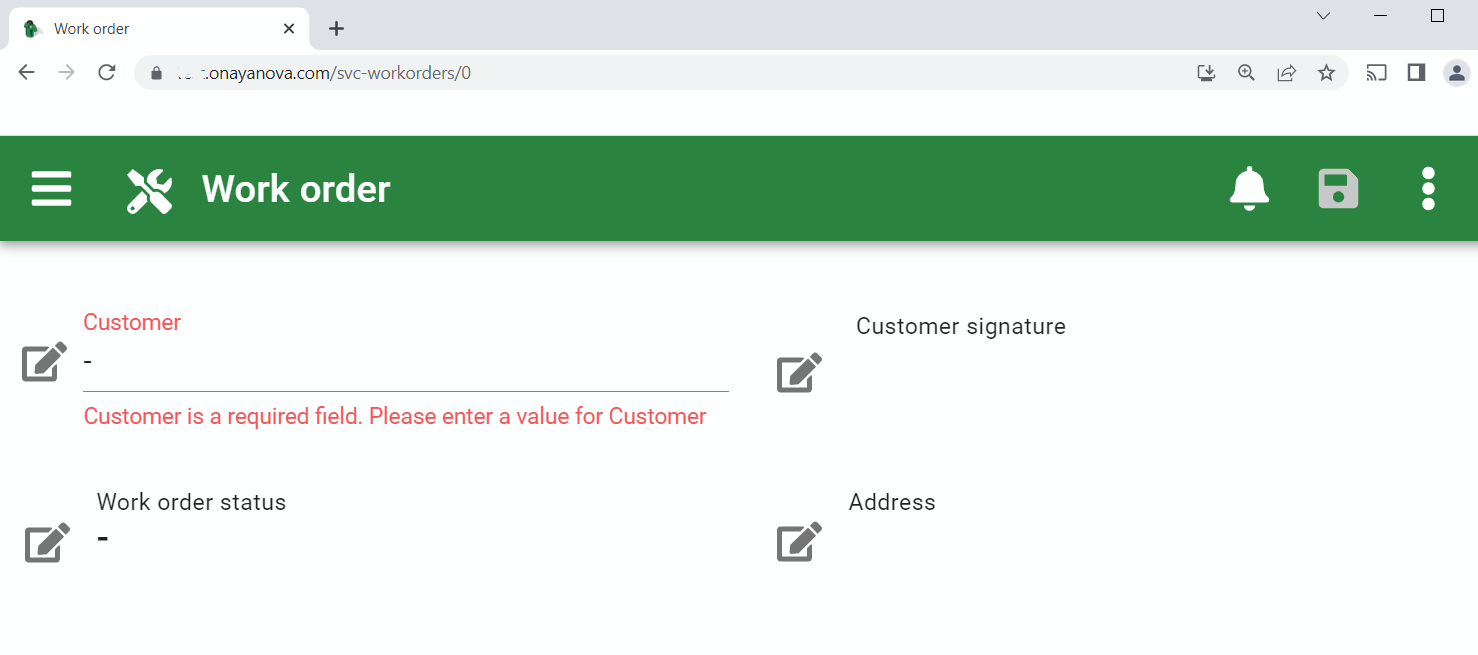
The only required field on a Work order is the Customer and it's empty right now so the Customer list field is showing a validation error, a red title and warning message explaining the error below the Customer autocomplete list.
You can't see it in the image but when the form is in an invalid state the save button is disabled until the issues are corrected as it would simply be rejected by the server if it was saved as it contains broken validation rules.
4. Select a Customer
If you needed to create a new customer
In this tour we're going to select an existing Customer but you could also create a new Customer right here by clicking on the open record button
![]() to the left of the Customer selection list.
to the left of the Customer selection list.
When you click on the open record button on any list but there is no item selected (indicated by the no selection item -), this triggers the creation of a new record of that type.
So if you started this work order without a Customer you can use the open record button to go and create a new Customer, then use the back button in your browser to return to this work order and select that Customer for this work order.
Selecting an existing customer
Let's fix the broken rule by selecting a Customer:
We want the Customer "XYZ Accounting" so we'll click into the Customers autocomplete list and type "xyz" to search for any Customers with those letters in their name:
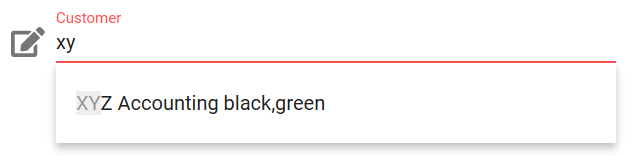
Since there is only one customer with XYZ in it's name, only one search result came back and is displayed in the list below the autocomplete control. If there were multiple matches, up to 100 of them at a time would be displayed in the results list.
(There are many ways to search and use the autocomplete list control to speed up entry, all documented in the autocomplete list help page)
You'll notice in the image that there are some Tags ("black, green") also showing with the customer name, this is because we've customized the Customer autocomplete list template to also use Tags for searching and selection. You can change this to include multiple fields as required from the Customer object.
We're using a desktop computer with a keyboard here and don't want to take our hands off the keyboard to select with a mouse so we'll press the down arrow to highlight the result "XYZ Accounting..." and press enter to select it:

The Customer is now selected as required by the form validation rules and it no longer displays a red validation error message.
5. Save the work order
We're not done yet but it's a good idea to save a record regularly as you work on it. Anything not saved might need to be entered again if something goes wrong at your end with your browser or connection to the network.
So far this work order only exists temporarily here in our browser.
You can see it hasn't been saved as it does not have a work order serial number displayed and the web address shows it's internal record id is zero

meaning it has no server provided ID number yet and only exists here in the browser and could be lost if we shut down our browser without saving.
Let's click on save now:

This action submits the form to the AyaNova server where it will validate the work order to check for any errors or broken business rules. If errors are found it will not save the record but instead return a list of one or more validation errors to the User to correct the problems. If no errors are found it will update the object in the database.
In this case there are no errors and so a new work order record is created in the database and the server returns an updated work order back to the browser where your local view is updated to match.
AyaNova has assigned this new work order an internal ID number of 104 which you can see in the URL bar which has changed from record 0 to record 104:

Also you can see in the image that this browser tab now shows the work order serial number assigned which is also 104. This is the page title in the browser and makes it easier to see what record is open in a operating system task bar.
This URL in the web browser is a complete link to this exact work order record in AyaNova so, like any page in AyaNova you can bookmark in your browser this record if desired or send the url link to another User to open this same record (provided they have the rights to do so).
In addition to the record id in the URL, the work order serial number 104 is now displayed in the work order form app bar:

The work order serial number and it's record id are actually two completely seperate things. The record Id will not necessarily be the same as the work order serial number, it's just worked out that way as the work order serial number automatic starting seed number has not been changed so record 1 was also serial number 1 etc.
Aside from the work order number the Server has also made some other changes to this work order for us.
Automatic work order changes
Because this work order is new and the Customer has been set, AyaNova was able to fill in some fields automatically based on the selected Customer.
Address
The server has automatically populated the Work order Address field from the Customer record. A work order keeps it's own copy of the Address to preserve the historical record if a Customer's address should later change and also a Work order may have it's own address distinct from the Customer for several reasons such as billing going to a Head office or servicing a Unit that has it's own address or no address at all, just GPS co-ordinates.
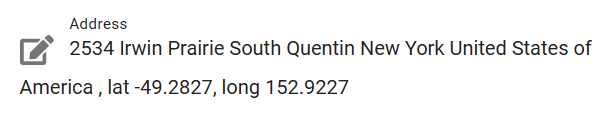
You can edit this address or change it at any time.
6. Enter a Summary
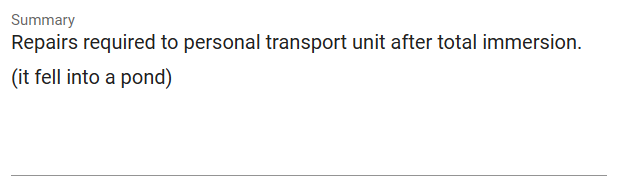
This optional field is a summary of the work to be performed overall. This field is intended to be viewed by the service technician and is displayed at the top of the stock "Service dispatch" report. Some shops work from the user interface directly on mobile devices, some print out dispatch reports to hand to technicians.
Here we'll describe the overall problem:
This is a simple work order so we'll leave the other fields in the header empty as we won't be needing them for this job.
Next up is to create a new Work order item to specify the equipment to be serviced and to schedule a service technician:
7. Add a work order item
Currently our work order only has a Header, there are no work order items so let's add one now.
Work order items are added from the Items context menu:

NOTE: this context menu button highlighted in red above is very important, it will have extra options once a work order item is selected and you will use it again later to add sub-items such as labor or scheduled users to a particular Work order item.
Because there are no existing items and no work order item is selected there is currently only one option available:

Click on New to create the new work order item:
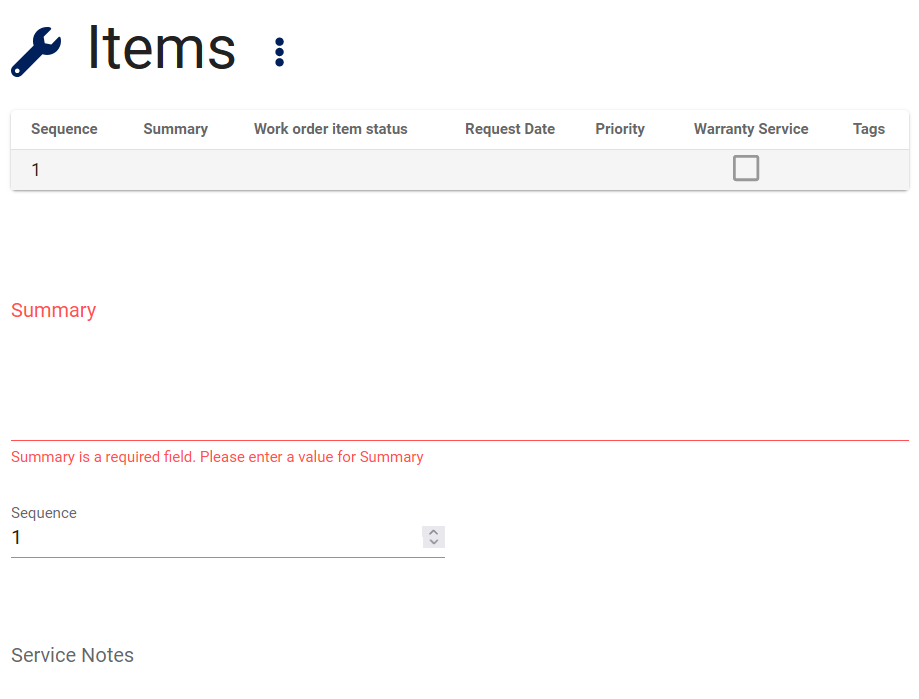
In the image above, the form has changed to display the work order items table and the current (only) work order item's edit fields are displayed beneath the table.
If there was more than one work order item they would also display in the table and clicking on the row would change the edit form fields to that work order item record.
Here we can see that the Summary field is required and needs to be filled in because it displays in red with a message displayed beneath the field.
Unlike the work order header's Summary field, this one applies to this work order item only and it does display on stock reports intended for Customers such as the Customer Invoice and Customer Work order reports.
This is a required field and something must be entered here.
Larger and more complex service jobs with multiple work order items often require a more detailed Summary of what each particular work order item is about so that each separate aspect of service is documented on each work order item independently and makes sense to the Customer and the technicians doing the work.
For example a more complex work order might have several work order items on it because multiple different areas, stages or Units of Customer equipment are being serviced on-site and keeping them in separate work order items helps to cleanly organize all the aspects of service for each item.
In many cases it's also useful to enter information here with future service calls in mind as all the text entered on a work order is searchable and it can be very useful to have a reference during service to past examples of some specfic type of work that was done before. Using AyaNova in this way turns all past service into a valuable knowledgebase resource and saves time "re-inventing the wheel".
There are no rules as to how the work order is used and you can enter as much or as little information as required to provide service and track information.
For a simple work order like this example, there isn't much need to enter more than the same duplicate information from the header summary.
Next up is to select the exact Customer Unit that requires service as this particular work is to repair an item of equipment that we track in AyaNova:
8. Select a Work order item Unit
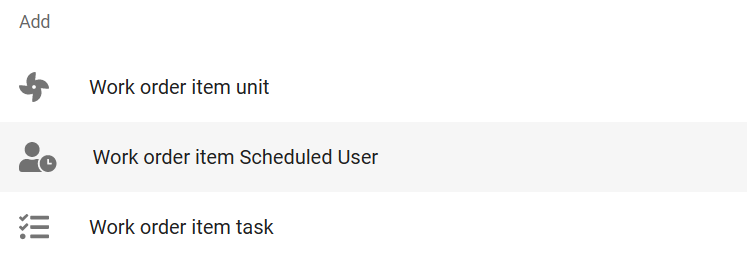
Now that we have a work order item the Work order item context menu you used above to make a work order item:
will be able to offer all the different types of objects that can be added to this item.
Clicking on the work order item context menu button again reveals a much larger set of items:
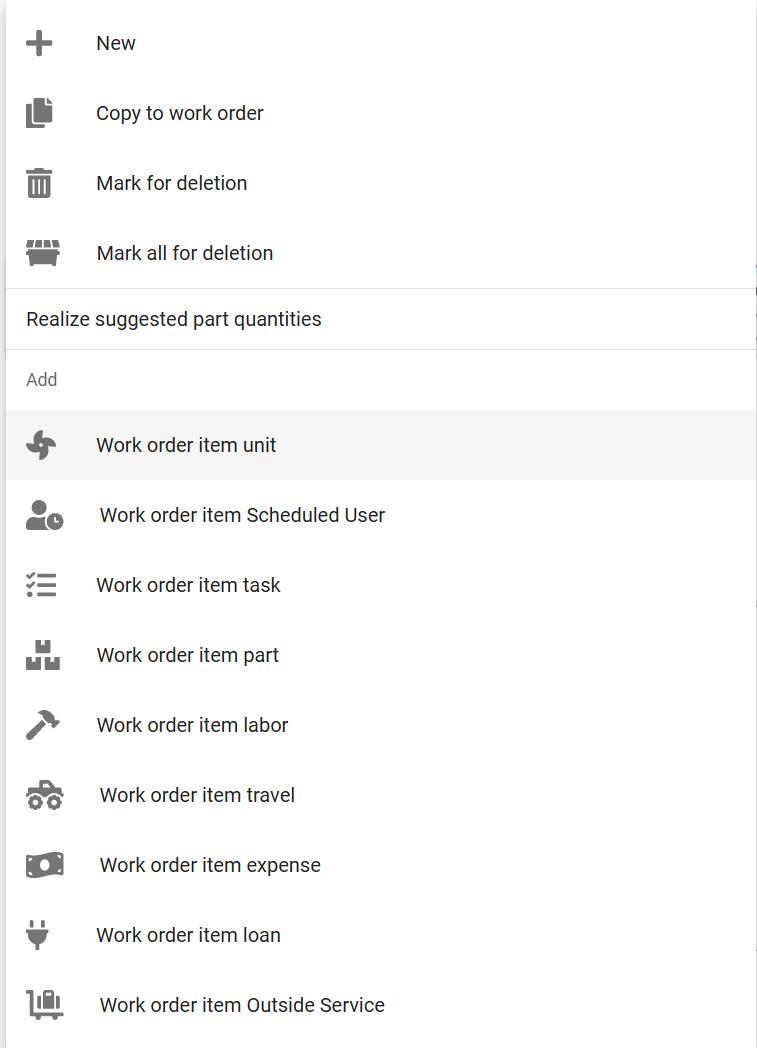
All of these items are optional and none of them will appear on the work order form unless that type of object is added.
Because we are intended to service a specific piece of equipment owned by the Customer and we want to keep track of it in AyaNova we will add this Unit to be serviced to the work order so we'll click on the Work order item unit option in Add section of the menu.
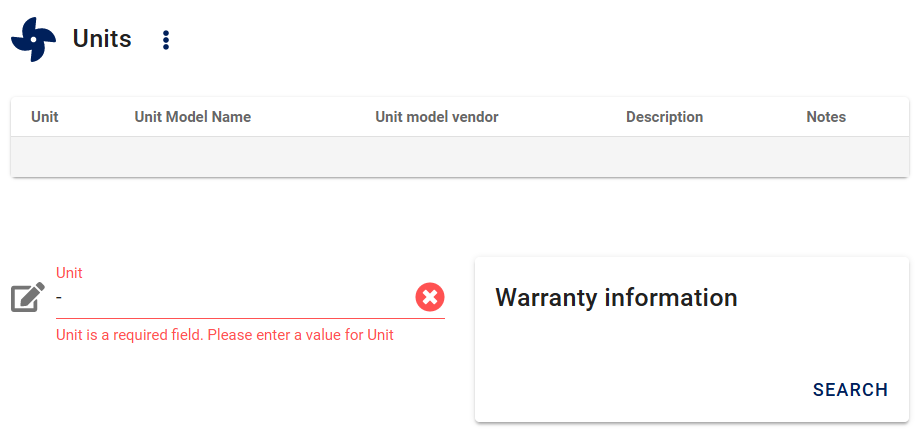
A new, empty Work order item Unit record is now added to the work order and as we can see it requires a Unit to be selected. This list contains all the Units previously entered for the selected Customer.
We'll go ahead and select a Unit and also save the Work order again since we've added a few things now.
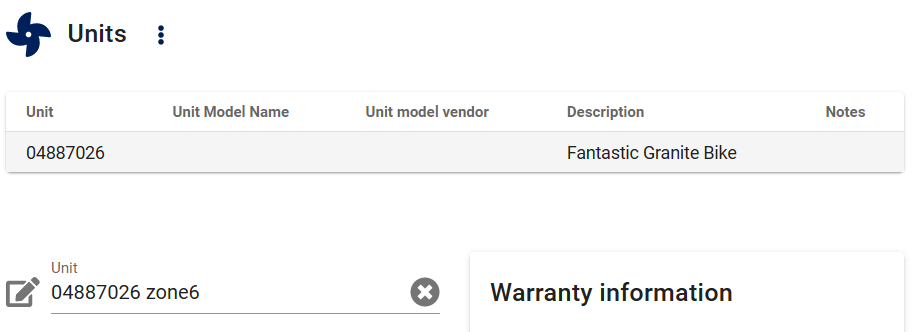
The Unit has been added and some desriptive information about it is displayed in the work order item Units table. The other fields here in the work order item Unit record are optional, (we could even hide them if we don't need them). Nothing more needs to be done here so we'll now schedule a service technician to do the work.
9. Schedule a service technician
A service technician is scheduled on a work order by adding a work order item scheduled user record so we'll go back to the Work order item context menu again and select to add a scheduled User to this work order item:
A new, empty Work order item Scheduled User record is now added to the work order.
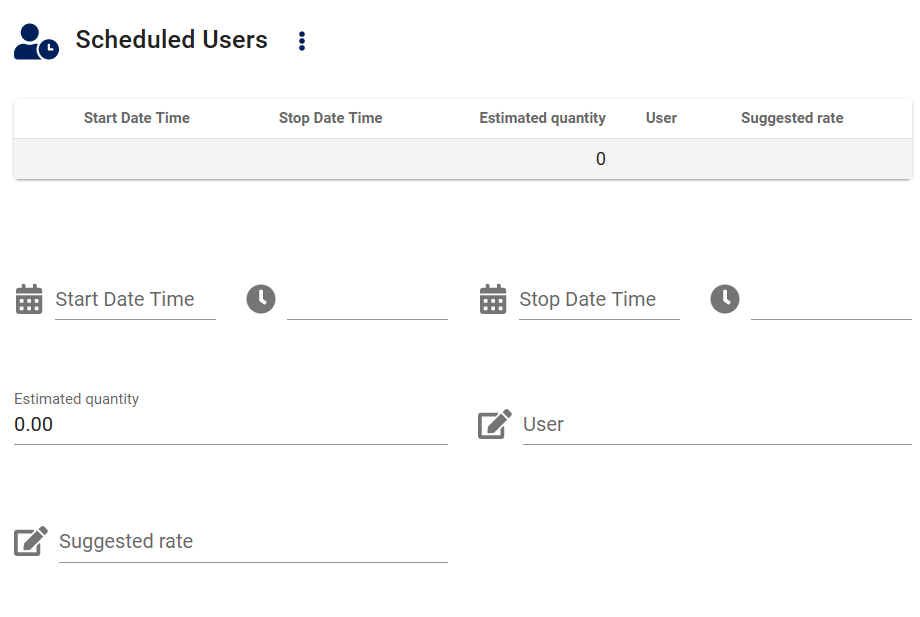
We'll go ahead and select the service technician we want to assign this work to, set a date and time for service and pick a suggested service rate.

Once we save this work order, Lamar the technician selected will see this item appear in their personal schedule form and it will also appear on the Service schedule form that shows all scheduled technicians for overall service management.
At this point the work order is completed for scheduling purposes.
10. Entering labor and completing the work order
Once the Unit is serviced by Lamar, he will fill out the billable details in the work order by creating a Work order item Labor record. AyaNova has a shortcut to save time - the Scheduled user record can be turned into a Labor record with a click from the Scheduled Users area context menu:
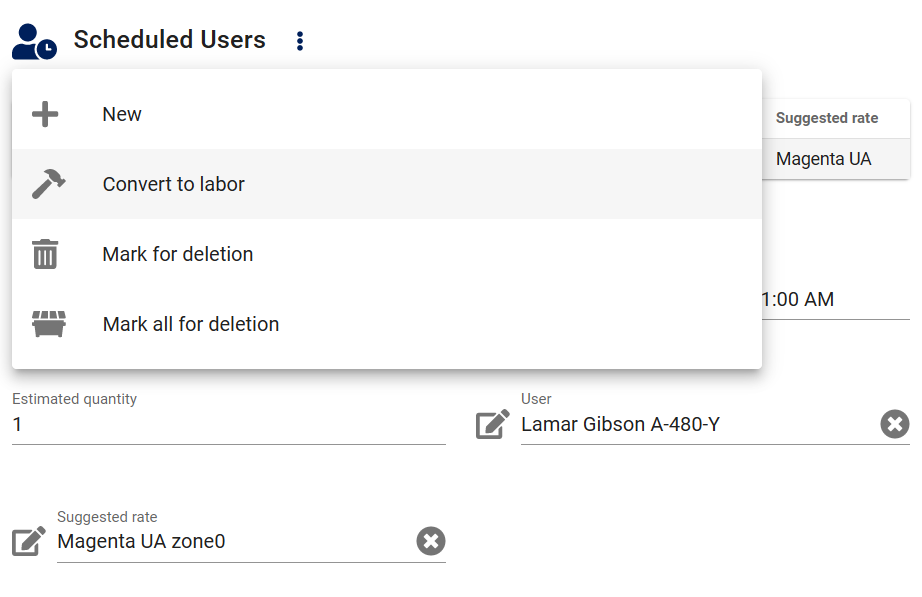
The Convert to labor menu item creates a new work order item Labor record, adds it to the current work order item and copies the details from the Scheduled user record:
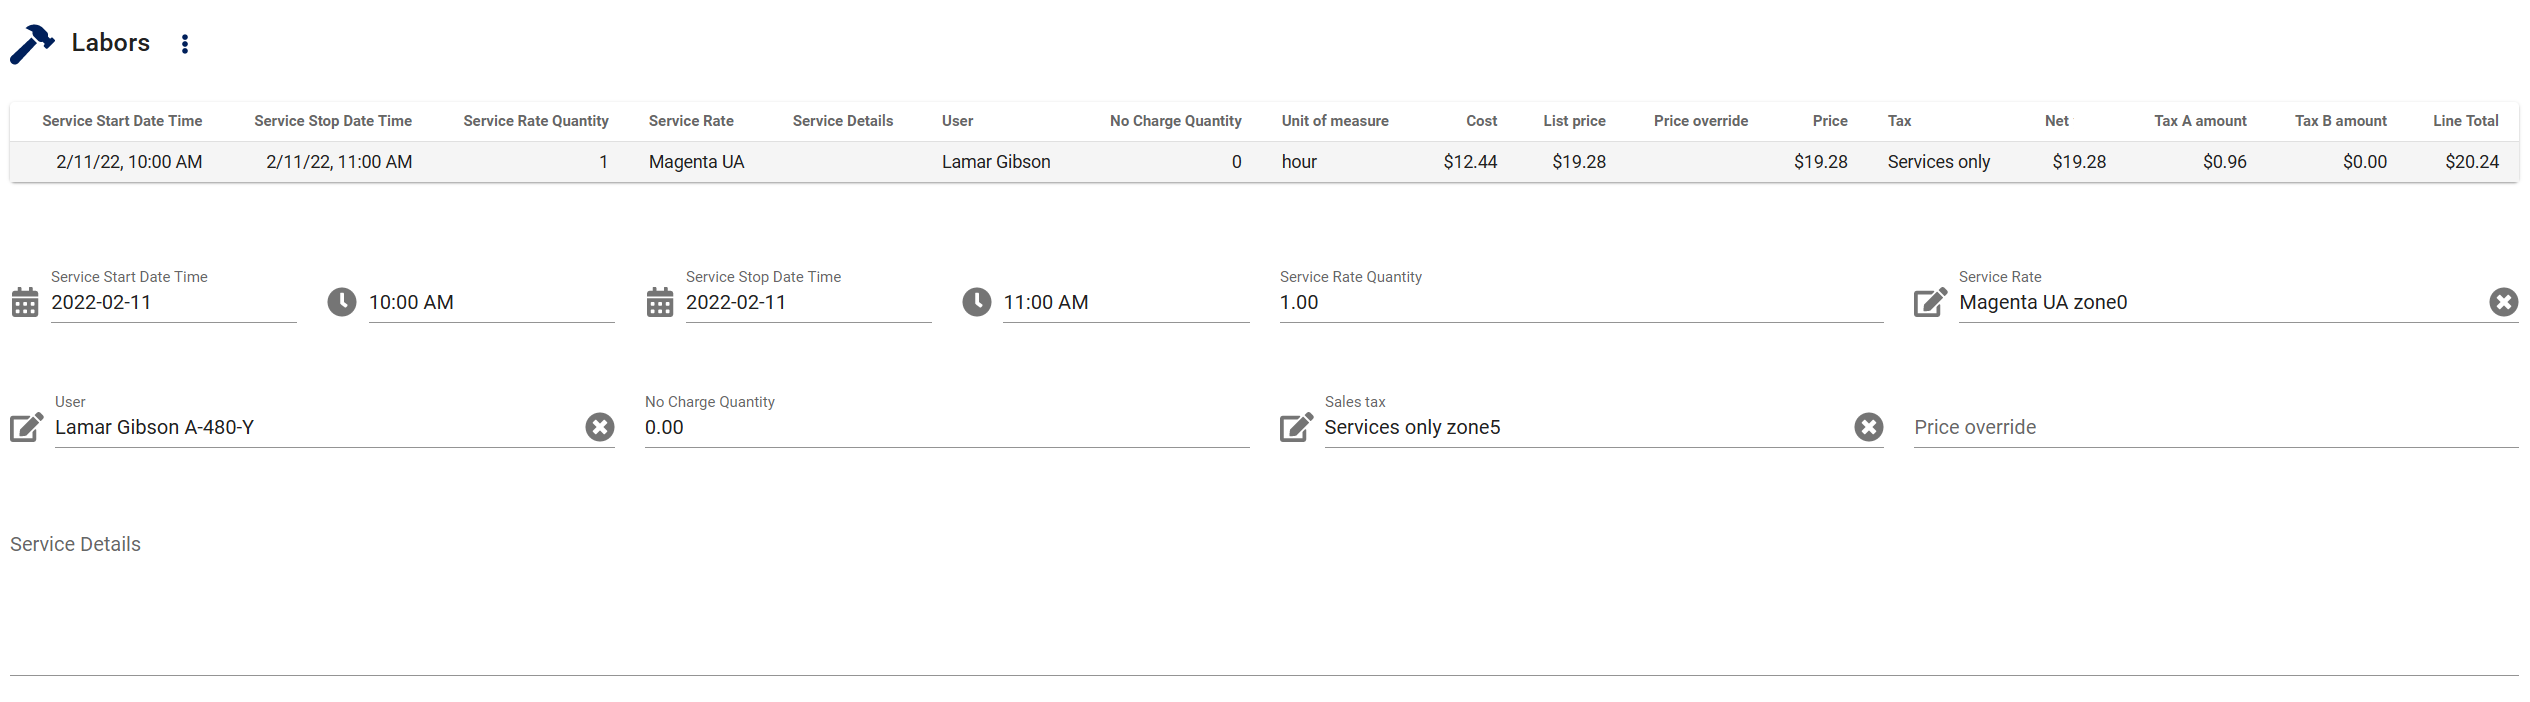
All that remains to be done here is for Lamar to optionally enter the details of the work he has done in the Service details field which will display on the various reports and be recorded for future reference.
At this point this work order is completed and ready for invoicing.
11. Print or email a Customer invoice report
Now that the work order has been completed it's time to bill it out.
In this example we are not using an accounting software integration like our QBI QuickBooks integration so we will create a Customer Invoice report from the work order.
Reports are accessed from the menu:
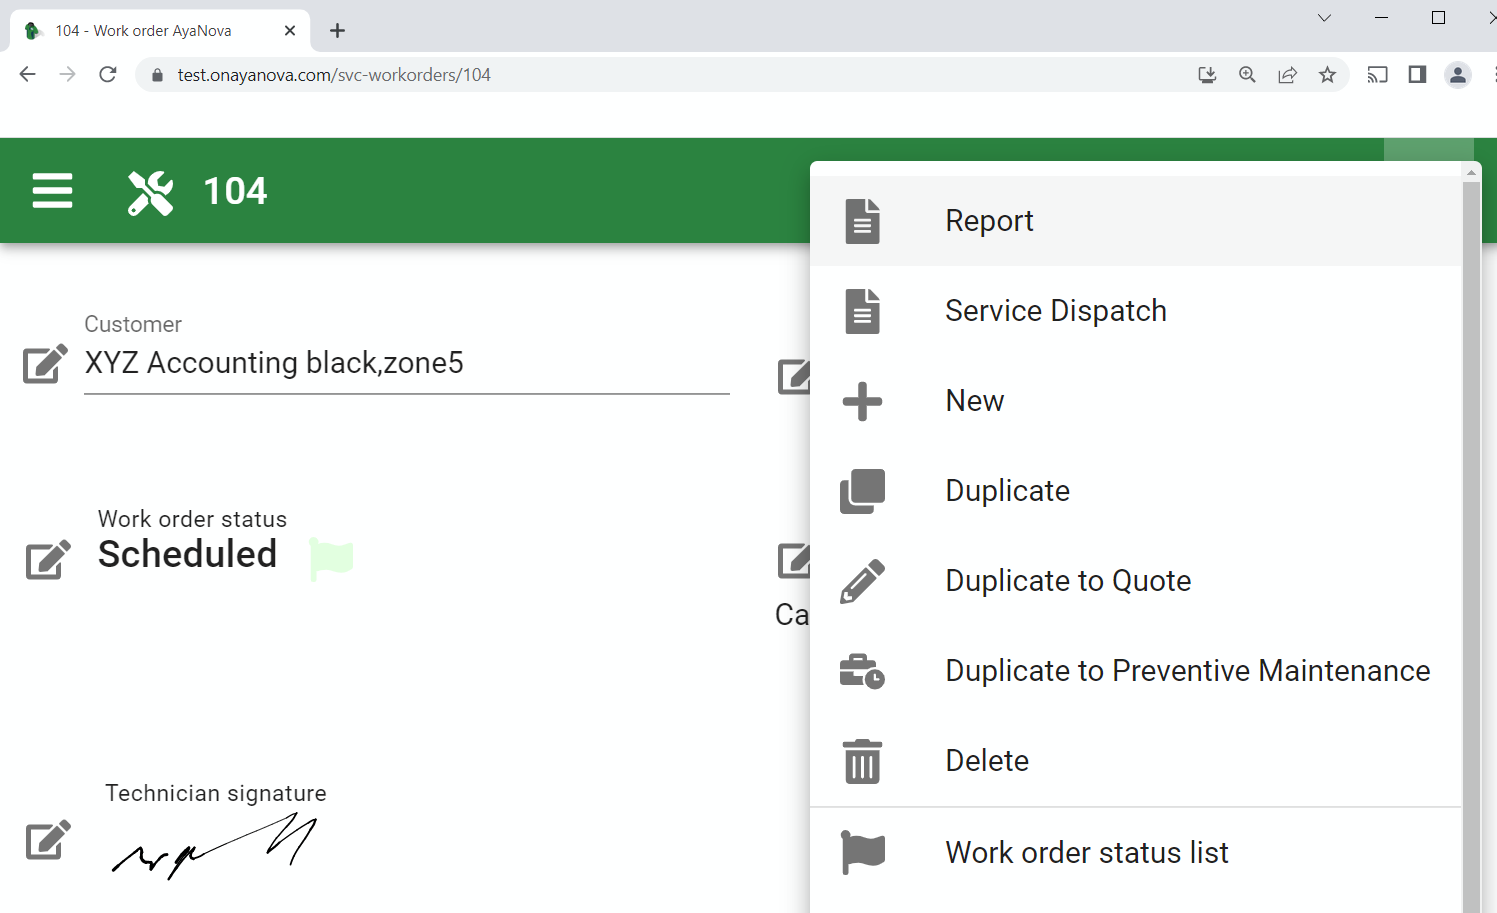
In the image you can see the Report option to open the list of reports available for a work order.
Right beneath the Report option is the last report selected for this form, in this case Service Dispatch.
This helps to save time when you regularly use the same report.
Go ahead and click on Report to open the Report picker showing the list of reports available for a service work order.
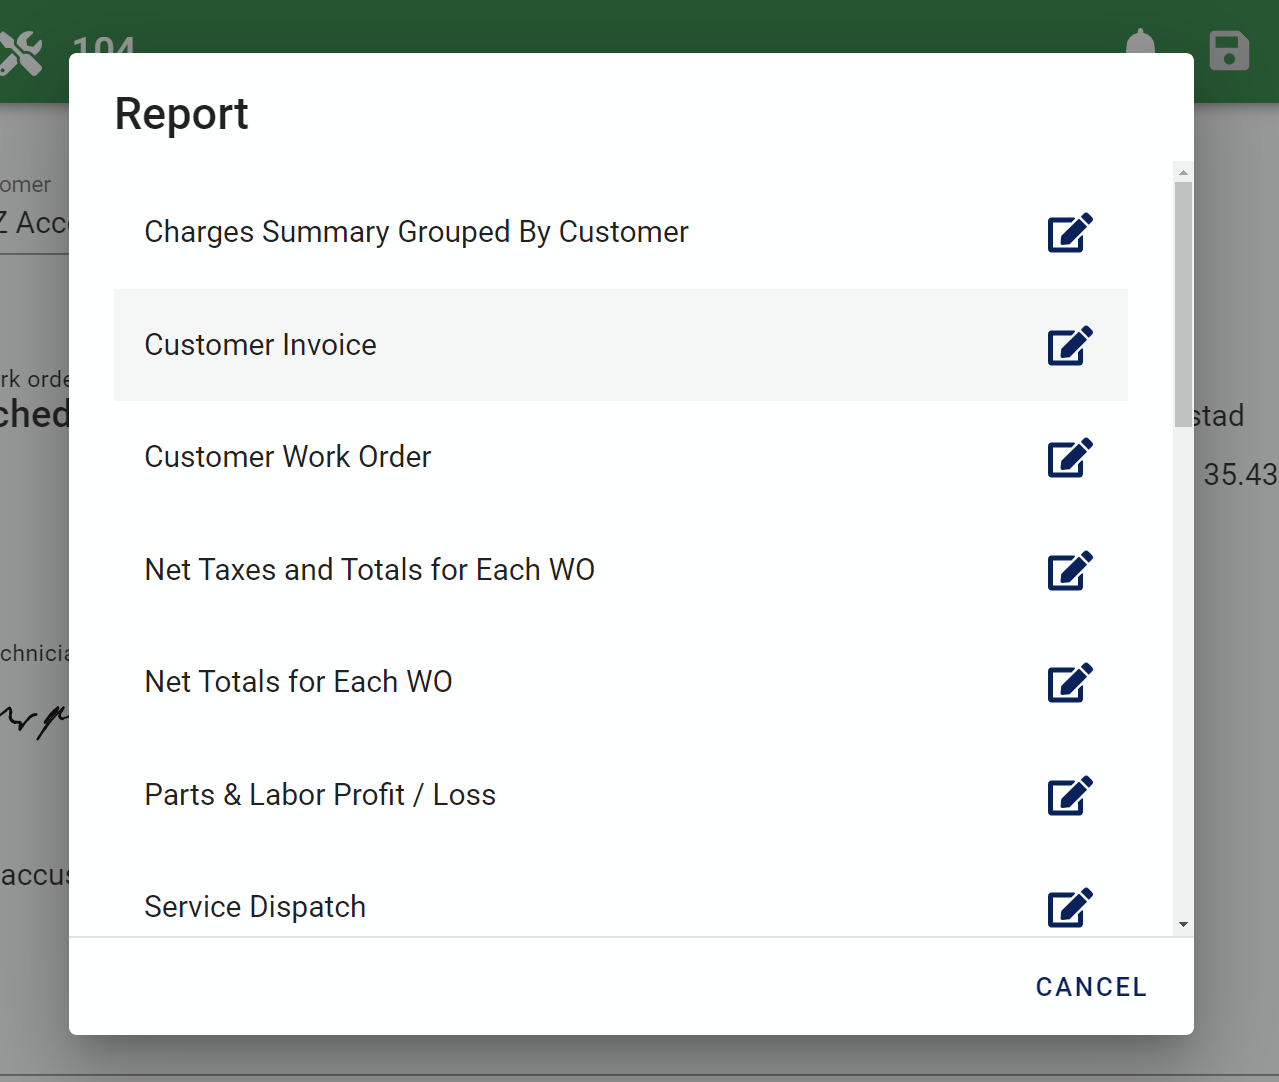
In the image above you can see a list of reports available here; the mouse is hovering over the Customer Invoice report causing it to be highlighted.
You can make your own reports to select here or modify the ones listed by using the Report template editor.
Go ahead and click on Customer Invoice to have the AyaNova server generate a PDF report from this work order.

(yes this image does show a different work order 104 from the one originally created for this tutorial)
Here we have the work order report ready to send to a printer or to the Customer directly as a .pdf file.
In the image above you can see the invoice number entered and even the Customers signature that they signed right on the AyaNova work order form using the built in Customer signature control (there's one for the service technician too if your business requires it).
Printing and mailing or emailing invoices takes away from billable time and is a bit of a hassle wouldn't it be nice to not have to do it in the first place ...
Customer self service option
You can optionally create a Customer contact User and give them the right to login to AyaNova and use a special Customer interface which enables them to not only select and view their own work order reports but even request service and other options as permitted by you.
Your Customers can also be automatically notified when service has completed or reached a particular status on one of their work orders through the optional Customer notifications feature of AyaNova.
These two features in combination can be used to eliminate paperwork and time spent by office staff by making the entire service cycle from the Customer requesting service to getting invoiced paperless and automatic.
There are too many things here I don't need!!
Yes, there are a lot of sections and fields available in a work order, it can be overwhelming at first and by default AyaNova shows all the fields you could possibly fill in for every form in AyaNova so Users getting started with AyaNova know what is available to them up front.
Maybe you don't need an Invoice number or Customer signature field or maybe you don't even need an entire section of the work order like the Work order item Travel section?
No worries: you're not stuck with all these extra fields or sections you don't need, simply customize the forms and hide anything that isn't required.
We have a hiding fields guided tour.