Guided tour: Create a Customer
We recommend having a look at the forms overview guide before taking the guided tours.
In this guided tour we'll create a Customer record.
The screen shots will show how AyaNova looks on a PC or tablet, if you are using a narrow screen device such as a smart phone your view will be slightly different but the functionality is the same.
If you don't already have AyaNova available to follow along, everything you need to get started is available here: Try AyaNova now.
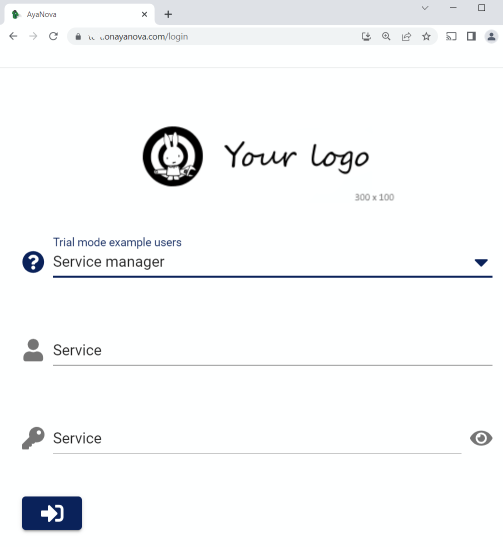
1. Login as a user with permission to make a Customer
For this tutorial you should login as a User with a full access Role to edit a Customer record.
If you are using generated AyaNova sample data, we've provided a sample User for each type of Role so for this tour you can login as the Service manager sample User to follow along:
2. Open the Customers list
Once you are logged in you need to navigate to an area of AyaNova where Customers are displayed and entered. There are a few different options to do that but we'll use the simplest one for this tutorial and create the Customer from the Customers data table:
Click on the "Hamburger" icon
In AyaNova the main way to navigate around is by using the navigation drawer which is an area that slides out on screen to choose where you want to go.
When logged in you can access the navigation drawer from what is commonly known as a "hamburger" icon (highlighted below) because it looks kind of like a hamburger:

Click on the hamburger icon to show the navigation drawer.
Navigation drawer Customers items
In the image below you can see the "Customers" area. Users with a different set of Roles will see different options here.
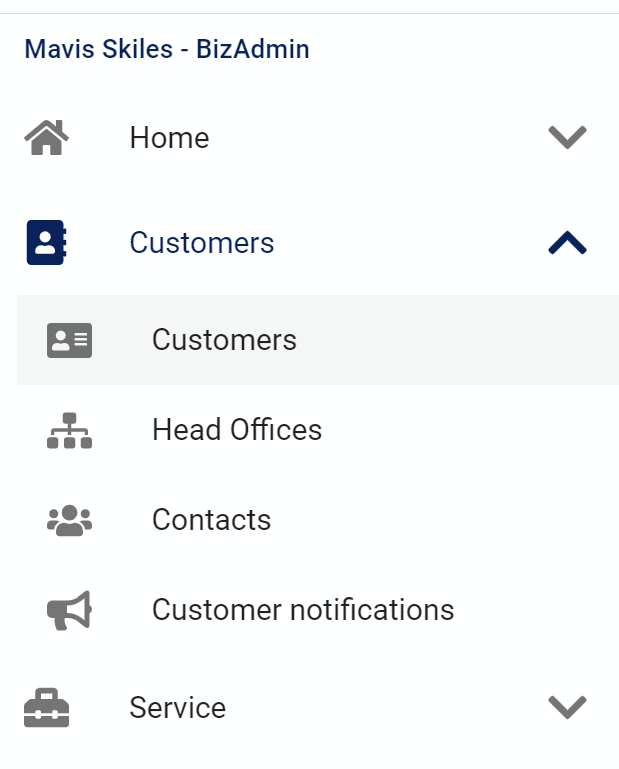
The area we want is "Customers" and the sub item also "Customers" so go ahead and click on that to cause AyaNova to navigate to the list of Customers previously entered in AyaNova:
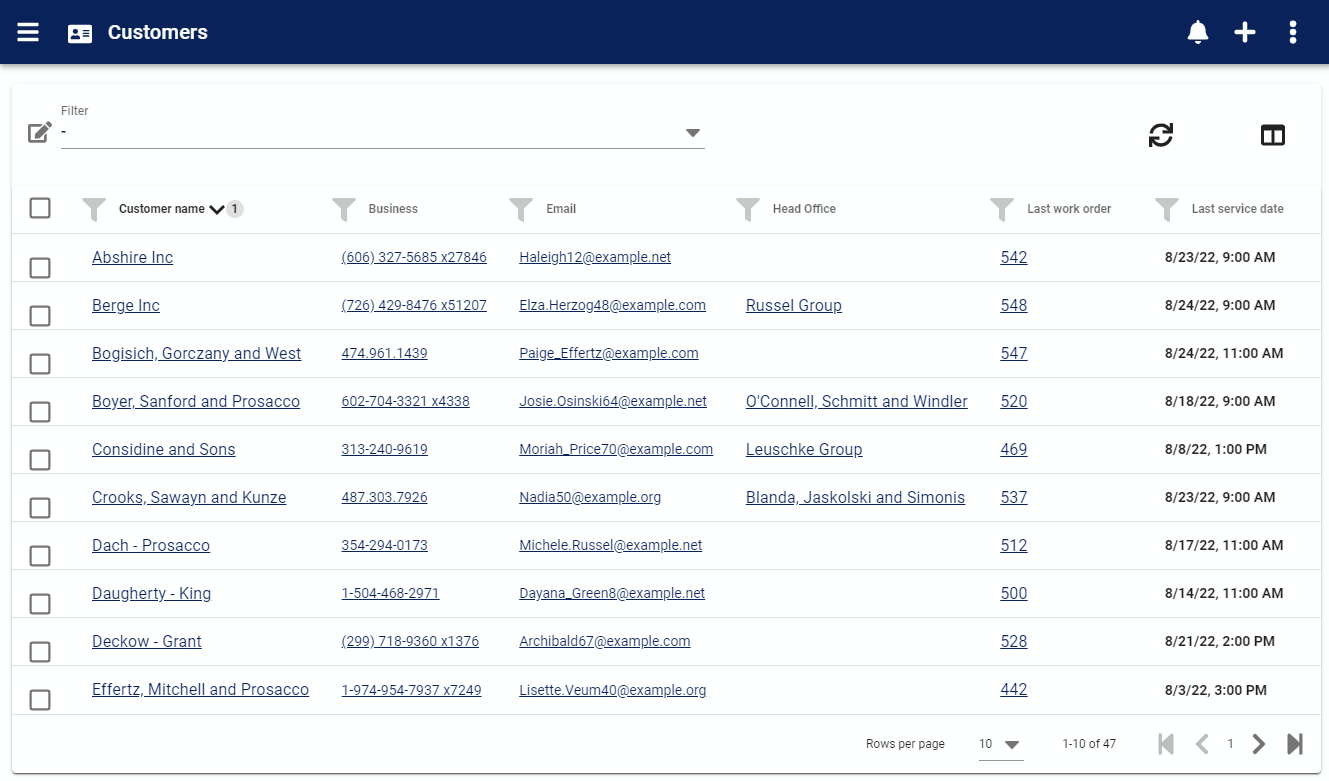
This list is known in AyaNova as a "Data table", data tables are used in many places in AyaNova for different kinds of objects. Data tables have many features and options to control what is displayed and how it's displayed so you can restrict the view to show only what is important for any given task.
3. Create a new empty Customer
Because the currently logged in User has rights to create a Customer the create new record button is available above and to the right of the list of Customers:
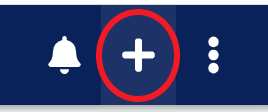
Anywhere you see this icon you can create a new record for that type of object.
Click on the create new record button to open a new empty Customer record:
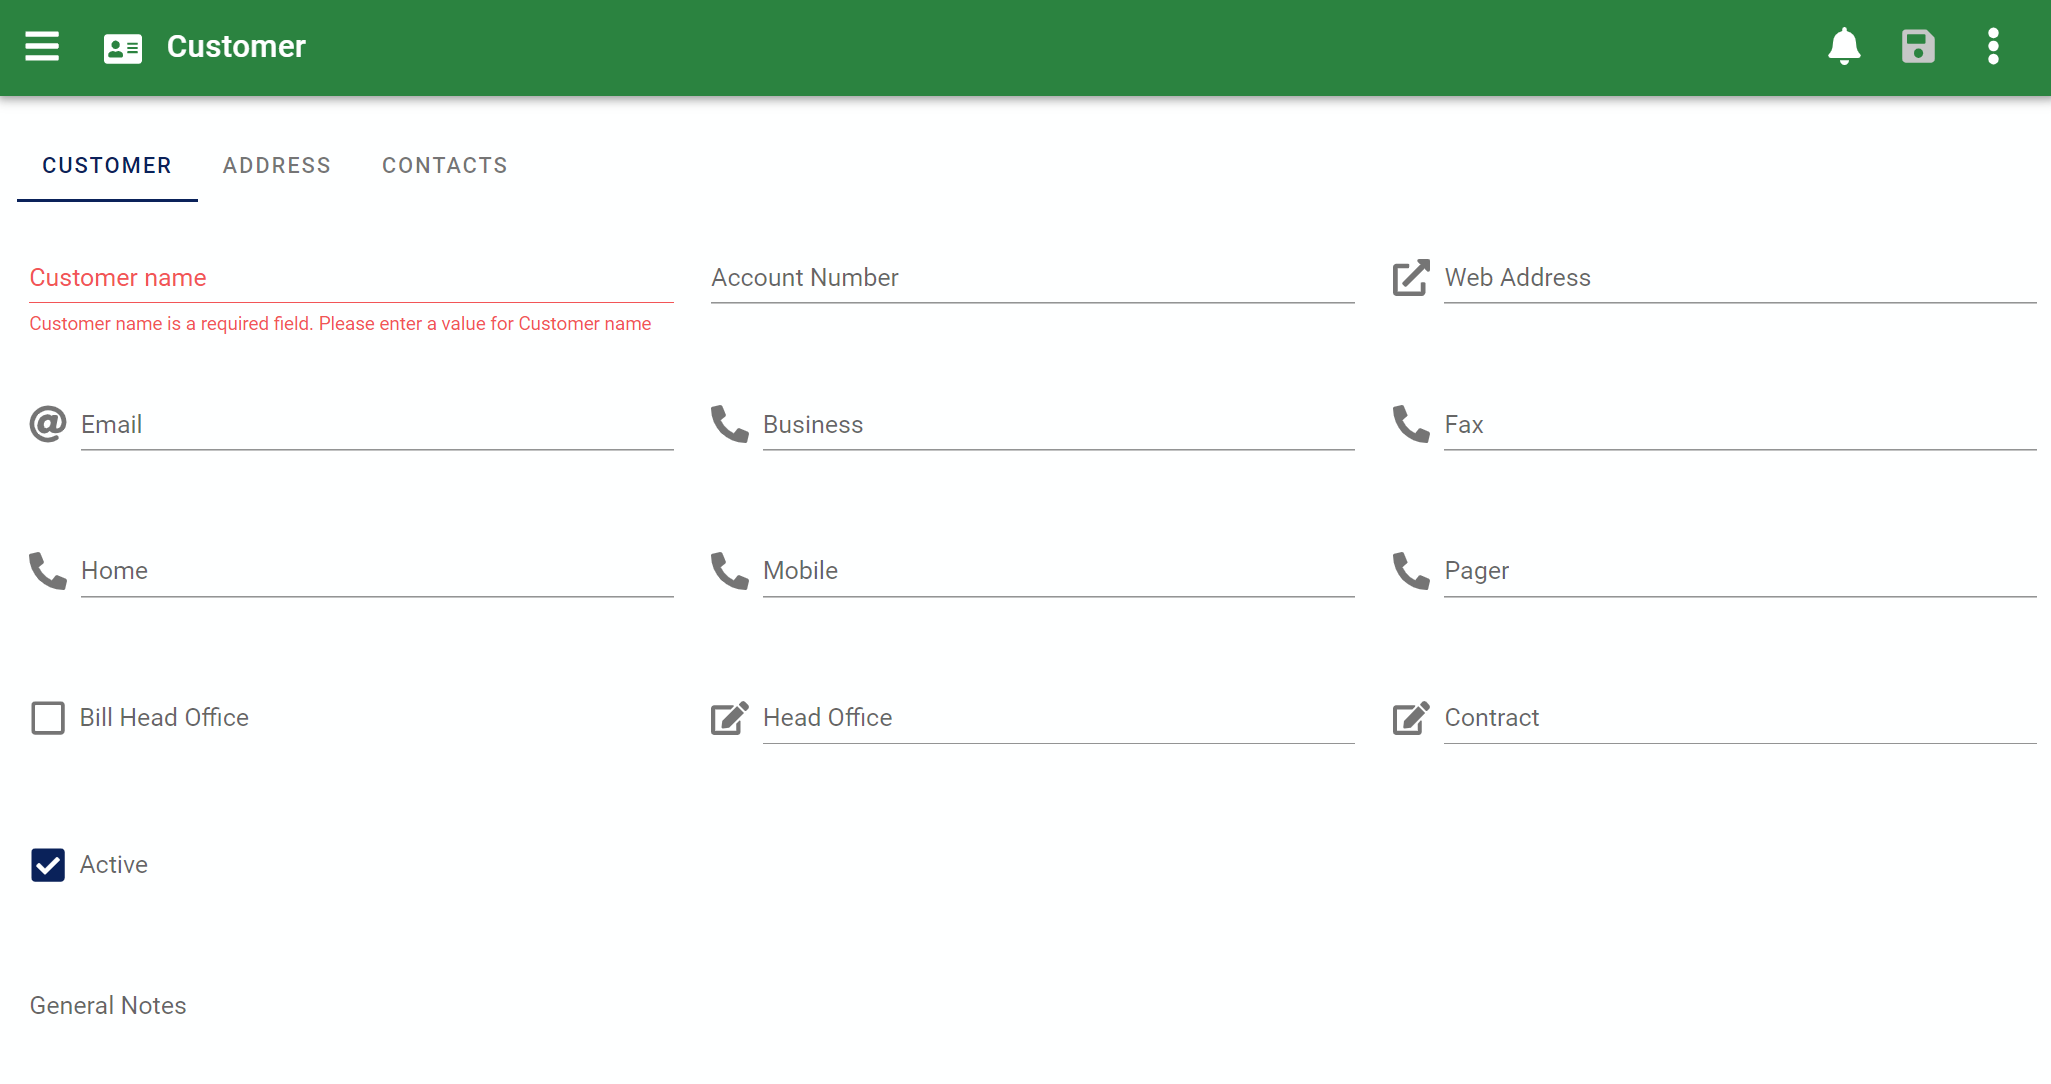
(this image shows only the top portion of the Customer form so it's easier to view here)
In the image above you can see that a new empty Customer record has been started, the fields are all empty and the only required field, the Customer Name field is showing a red broken rule display indicating there is something wrong with that field.
The only required field on a Customer edit form is the Customer's Name and it's empty right now so the Name field is showing a validation error, a red title and warning message explaining the error below the Name field.
You can't see it in the image but when the form is in an invalid state the Save button is also disabled until the issues are corrected as it would simply be rejected by the server if it was saved as it contains broken validation rules.
Let's go ahead and enter a Customer Name now:
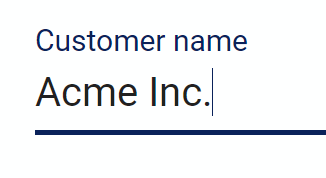
You'll notice that as soon as you enter anything into this field the error goes away.
We can now save this record to the server as it has met the minimum requirements to be saved.
Save early, save often
Changes made here in the browser only exist here locally until they are saved to the server so it's good practice to regularly save a form as you're working on it.
When a form is saved the server validates it meaning it checks to make sure that all required fields are filled in and that any business rules are followed. By saving regularly you don't get a surprise after doing a lot of work that might require changes.
One business validation rule that applies to most objects is no two objects of the same type can have the same Name. You may find yourself entering in a Customer (for example) that someone else has already (or just recently) entered. If you try to save a Customer and one with the same Name already exists AyaNova will reject the save and tell you that there is already a Customer with that Name in the system. Saving early when you first enter the Name but haven't filled in the rest of the form yet saves all that hassle.
AyaNova uses a "First save wins" method of conflict resolution. If two Users edit the same record at the same time, the first person to save the record "wins" in that their changes are accepted by the server but the second person to save gets an error message indicating that another user has made changes since they first opened the record. This system means no one can lose their changes without knowing it but it does mean that you may have to re-enter data if there is a conflict. For this reason it's good to save early and often when editing records that could potentially be edited by others at the same time.
Filling in the details
Technically, we're done, this is now a valid Customer that will appear in the main Customers data table, can be chosen in autocomplete select lists for selection on Work orders and other records and tracked in AyaNova.
There are a lot of fields we could fill in here, only some will be important or required and that will depend on your business and what is important to you.
For a description of what each field is and can be used for refer to the Customer edit form reference page.
Generally speaking most companies will enter a Customer name and business phone and / or email address.
Addresses
Addresses are usually very important to a service company for getting technicians onsite and / or mailing out documents and AyaNova has some handy features in the Address controls that you can read about in our Address control documentation.
Email address
If you collection and enter Customer email addresses they can be used in conjunction with the Customer notifications feature to automatically notify your Customers about important service events.
Customer contacts
The Customer edit form has a Customer contacts tab where you can enter in contacts for the Customer.
Customer contacts in AyaNova are not only a list of names and numbers but also can be enabled as full Customer login Users enabling them to login to AyaNova and use a special Customer interface which enables them to not only select and view their own work order reports but even request service and other options as permitted by you.
There are too many fields!!
Yes, there are a lot of fields and by default AyaNova shows all the fields you could possibly fill in for every form in AyaNova including the Customer edit form so Users getting started with AyaNova know what is available to them up front.
Don't need a Fax number field? No problem, you're not stuck with all these extra fields, simply customize the forms and hide the fields that are not required.
We have a hiding fields guided tour.