Guided tour: Customize displayed text
In this guided tour we'll change the default title text that displays for a couple of fields on the Customer form by changing their Translation.
The same technique you learn here applies to any other type of form in AyaNova.
All program text displayed in AyaNova comes from stock Translations for various languages included with AyaNova that you can change.
You might want to make some small changes to better reflect terminology used in your business or industry or even create an entirely new translation to a language for which we didn't provide a stock translation.
Here we'll make some small changes to a Customer form just to show how it's done.
The screen shots will show how AyaNova looks on a PC or tablet, if you are using a narrow screen device such as a smart phone your view will be slightly different but the functionality is the same.
If you don't already have AyaNova available to follow along, everything you need to get started is available here: Try AyaNova now.
1. Login as a user with permission to modify Translations
In AyaNova a User needs permission to view and make changes to objects, this permission is called an Authorization role in AyaNova and an administrator grants permissions to each User as required.
Only a User with the Business administration role can customize Translations.
For this tour you must login as a User with that Role.
If you are using generated AyaNova sample data, we've provided a sample User for each type of Role so for this tour you should login as the Business Admin / BizAdmin sample User to follow along:
2. Create a company standard translation
The stock translations that come with AyaNova are read only and can't be modified, so in order to customize a Translation you create a copy of a stock translation and modify the copy instead.
Usually you want all Users in your company to be using the same Translation so it's commone practice to make a default standard company Translation that all Users will be set to use.
Let's go ahead and make a new company standard translation that all our Users will be using.
Navigate to the Translations table
The first step is to go to the Translations data table:

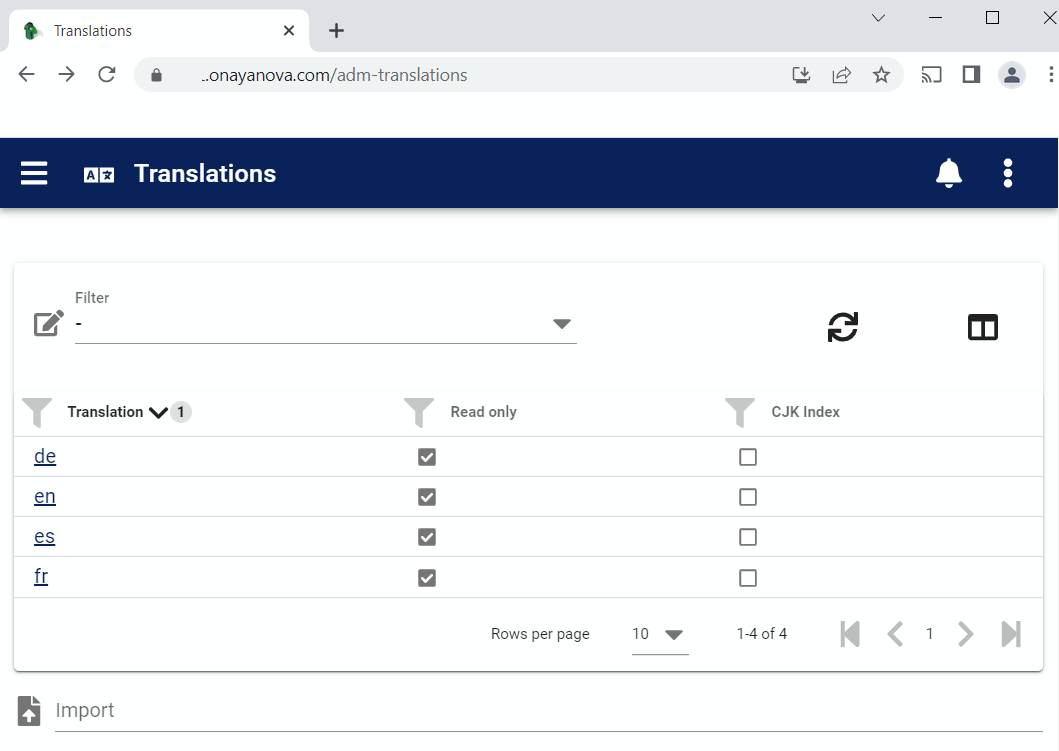
In the image above we can see the stock Translations that come with AyaNova: "de" for German, "en" for English, "es" for Spanish, and "fr" for French. The two letter names of each stock Translation are the standard international language codes and recognized by users of those languages.
The image also shows that we have no other custom Translations yet.
Duplicate a stock translation
A new custom Translation is made by copying an existing stock translation.
We're going to modify one based on English so let's open the stock English translation by clicking on it's name in the table "en":
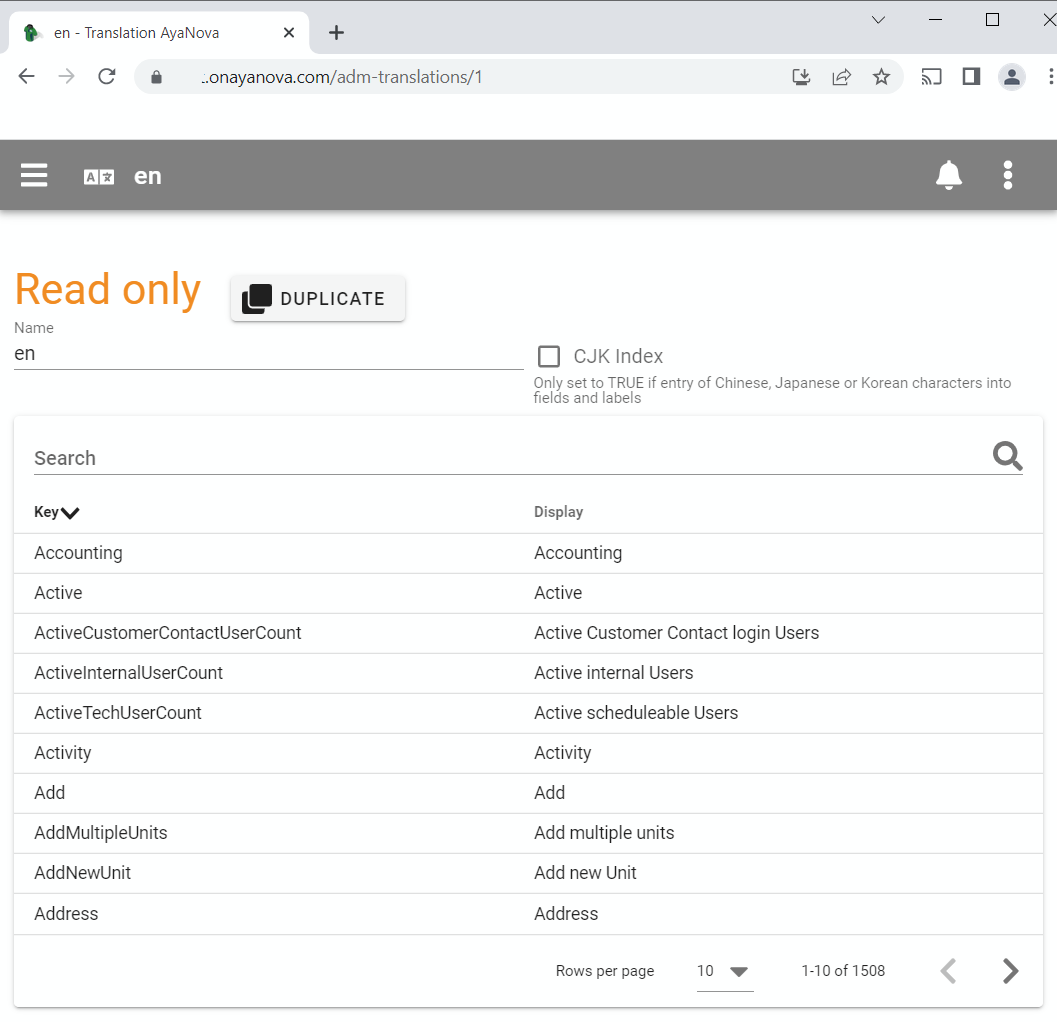
In the image above we have the stock English translation opened, it's read only and not editable so we must duplicate it to create our custom translation.
We'll click on the "Duplicate" button now to do this. It takes a few seconds to copy an entire translation and duplicate it at the server but once it's done our new duplicate editable Translation will open:
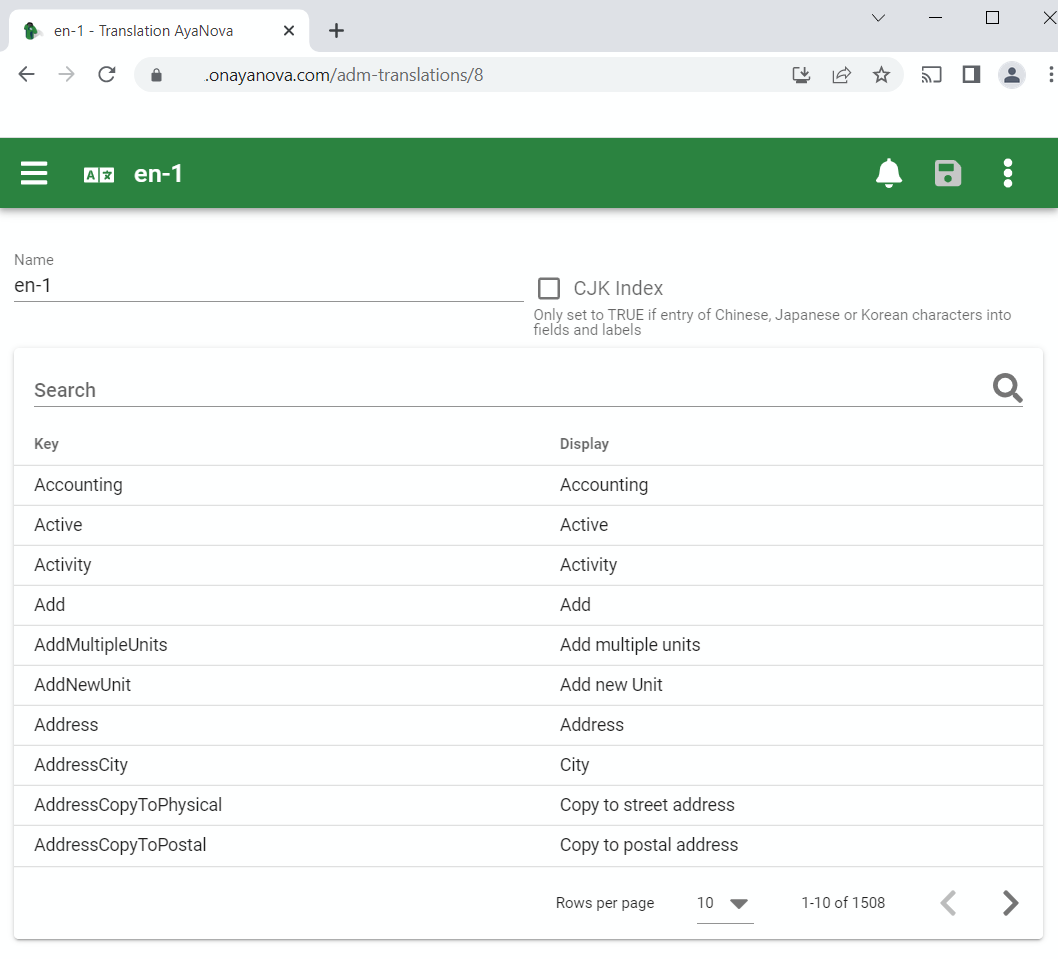
The server has automatically named it "en-1", let's go ahead and rename it to something better by typing a new name into the Name field and saving the Translation:

3. Customize text
Our company doesn't need an "Account number" field for our Customers but we do need a "File number" so that's one change we're going to make, also we don't need a "Pager" phone number but our company provides service for many critical infrastructure customers so we do need a "Emergency contact" phone number for the customer's on duty emergency contact phone for emergency service.
Translation items have a "Key" property that is fixed and not editable and is used by AyaNova internally to identify fields and a "Display" property that is set to the text that will be displayed to the User in the AyaNova user interface and on reports.
The Translation form has two columns for these properties and we need to find the Key we want and then click on the text in the Display column to open an editor and change it.
We can find the exact Key used by opening the Customize menu option in any form to display the list of fields that are customizable, the key name displays under the title of displayed to the User, but we can also just do a search for the text we want to change which is often faster.
We know we want to change the text "Account Number" in the Customer form as it's displayed to the User now so let's just type in "account" in the search box and see what comes up:
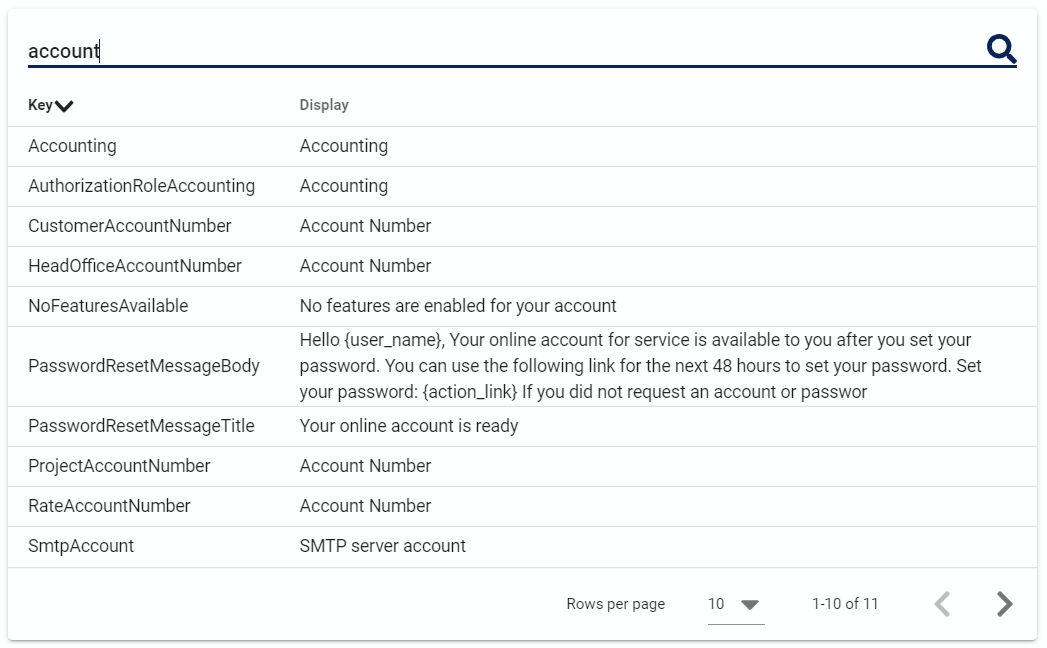
Here we can see all the places in AyaNova that the text "account" is displayed and the third one listed has the key "CustomerAccountNumber" (notice the search is not case sensitive and we ordered by the Key column by clicking on the Key column header).
All Translation key names start with the name of the object they are referring, in this case it's "Customer" so we know this is the one we want to change.
Click on the text "Account number" in that row to edit what is displayed and change it to "File number":
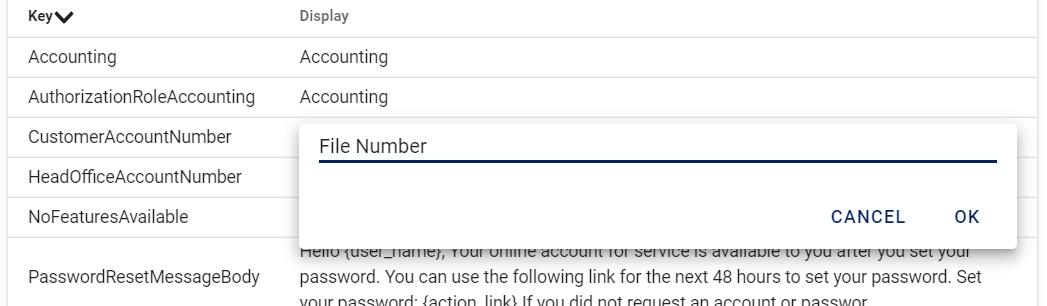
Click on OK to confirm the local temporary change and then also go ahead and click on the Save button at the top of the form to save the change to the server.
Now type "pager" in the search box to locate the "Pager" phone number field and you'll see it's internal Key name is "CustomerPhone5".
We'll click on the "Pager" display text and change it to "Emergency contact", click on OK to accept the changes and then save the form again to send the changes to the AyaNova server.
Now it's time to set our own User account to use the new Translation so we can confirm it looks how we want before we have other Users switch to this new translation.
4. Set our User account to the new Translation
Users in AyaNova can select their own Translation from their User settings form in their Home screen, an Administrator can also set it for them by going to the Administration Users form and opening and editing their User account for them.
We'll change it for our own currently logged in User first to test it out.
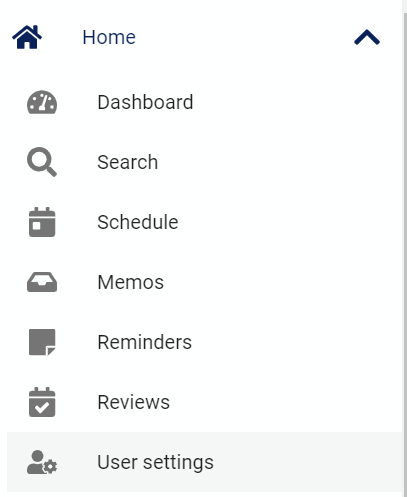
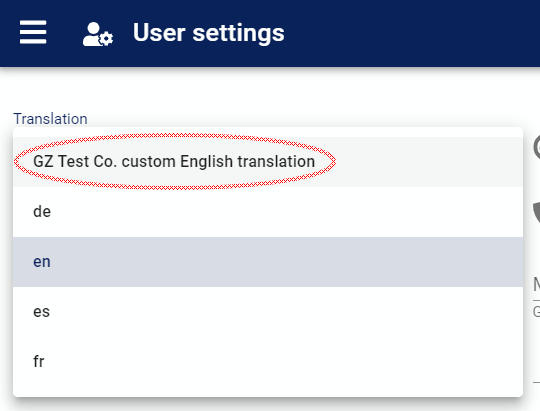
From the navigation pane click on Home then User settings:
Here we can see that for this User the current translation is set to the stock English or "en" translation:
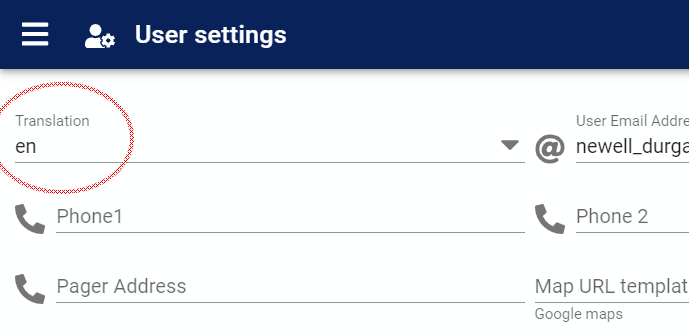
We need to change this and select our custom translation we made in step 2:
And then save our User settings using the Save button at the top of the form.
The moment we saved our change to the new Translation, AyaNova automatically downloaded and switched our local User account to use the new Translation selected so we can now go to the Customer form and confirm our changes have taken place.
5. Open a Customer edit form and confirm changes
Navigate to an area of AyaNova where Customers are displayed in their data table.
Navigation drawer Customers items
In the image below you can see the options available to the sample "Business admin" User generated by AyaNova.
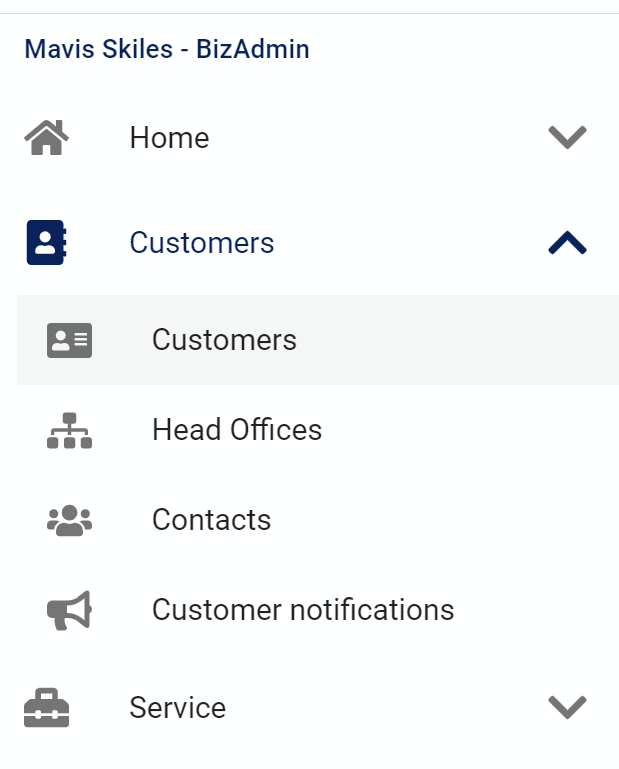
The area we want is "Customers" and the sub item also "Customers" so go ahead and click on that to cause AyaNova to navigate to the list of Customers previously entered in AyaNova:
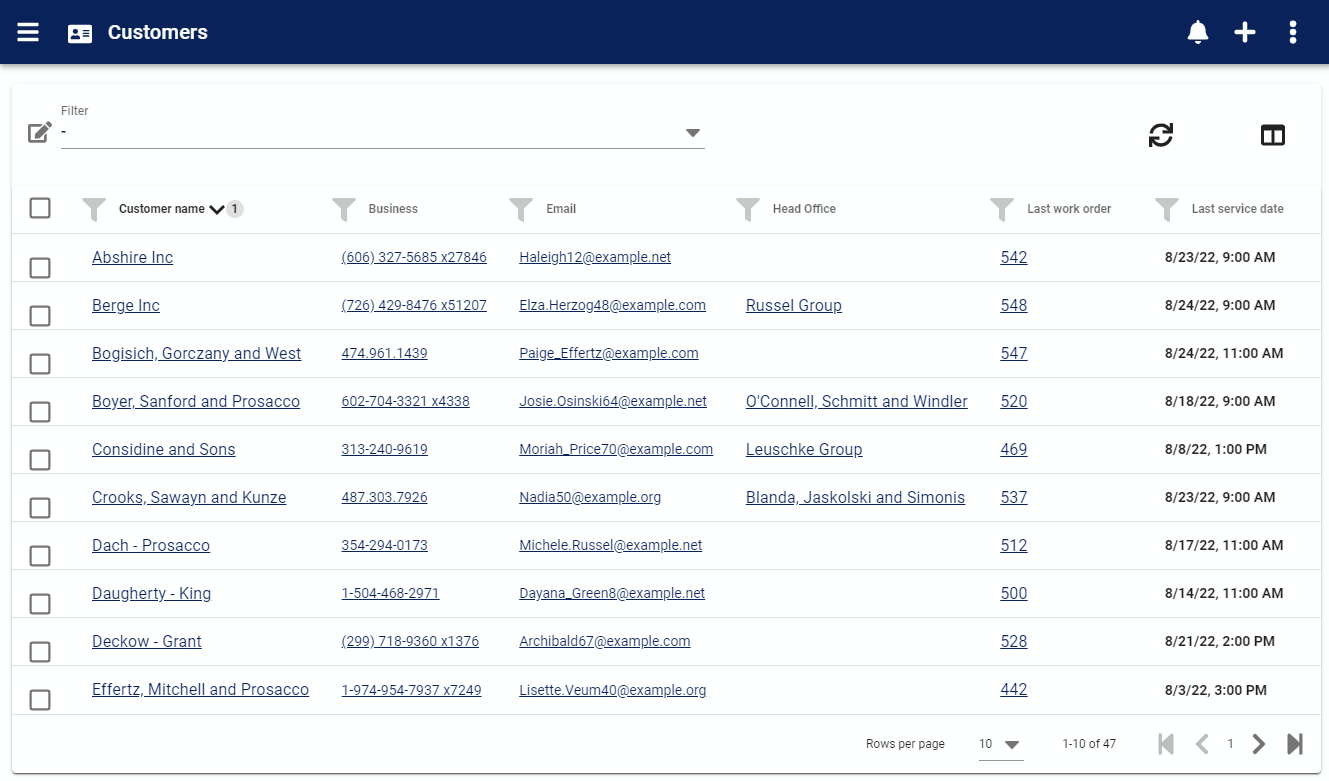
Open a Customer record
Now click on any Customer's name in the list to open their record in the Customer edit form.
Confirm changes
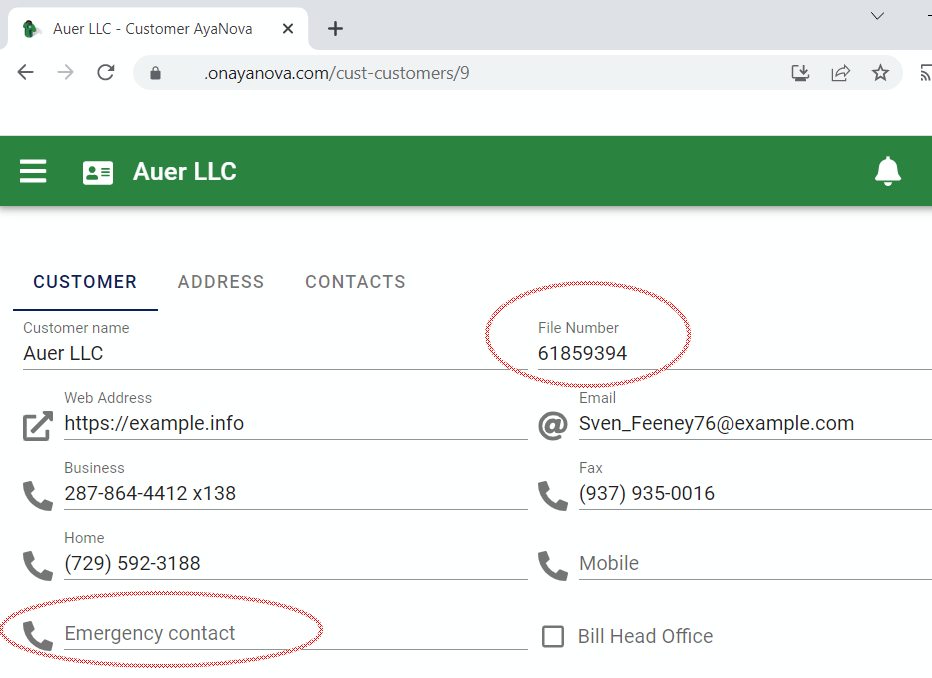
In the image above we can see our changed field titles in the Customer edit form.
We're happy with these changes and want to roll them out to all Users so the next step would be to either have Users go into their own home User settings and select the new Translation or do it for the User's from the Administration Users form and opening and editing their User account for them.
Future changes
Once Users are set to the new company standard Translation, if you make any changes to that Translation you will personally see them take effect immediately when you save them because AyaNova will update your local Translation automatically in the browser from where the change is made, however, other Users won't see those changes until they log out and back in again to reload the entire Translation.
Reports
Our stock reports use Translation keys for field titles just like the forms do, so reports will automatically show the new Translation.
Reports automatically use the Translation that the User is set to use in the AyaNova user settings.
If you have made your own reports or customized existing ones we recommend using the Translation Helper as we have done with the stock reports so that your Translation changes will automatically be picked up by the report rendering engine and you won't need to edit those reports by hand to make the same changes.